Odoo 17 CRM
In Odoo 17 the CRM module boasts several enhancements, including an improved user interface, reduced data entry tasks, automated lead generation, data deduplication, online lead generation, live chat and call capabilities, multiple addresses across various domains and servers, email sending functionality, and analytics with graphical reports.
In this article, we explore how to harness the power of recurring plans in Odoo 17 CRM to drive revenue growth and streamline billing processes.
Recurring Plans in Odoo
Recurring billing is a payment strategy used by companies to bill clients regularly for goods or services they receive. It's commonly employed in subscription-based businesses, where clients authorise automatic deductions from their accounts. Businesses offering services like telephony, newspaper subscriptions, gym memberships, and SaaS applications often utilise recurring billing. Unlike subscription billing, recurring billing typically doesn't involve multiple pricing tiers, although subscription businesses may offer various pricing plans.
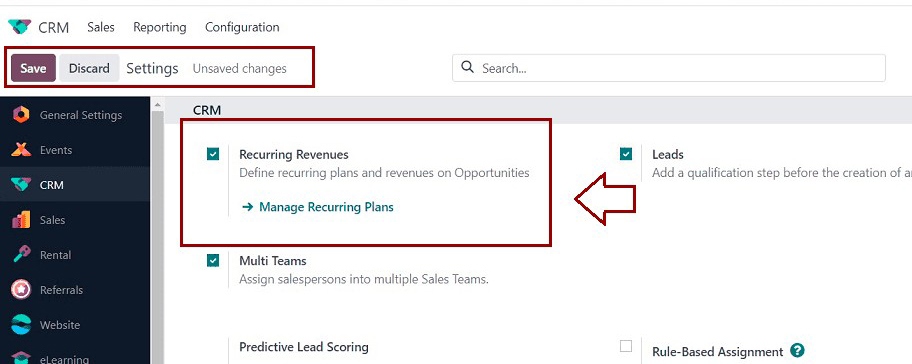
To activate the Recurring Revenues option in the Odoo 17 CRM module, follow these steps:
- Log in to the CRM module.
- Click on the "Configuration" menu and select the "Settings" option.
- Navigate to the "Recurring Plans" option under the Configuration tab.
Once activated, the Pipeline window will display in the CRM module.
Selecting the “Settings” option will open the settings window, as illustrated below.

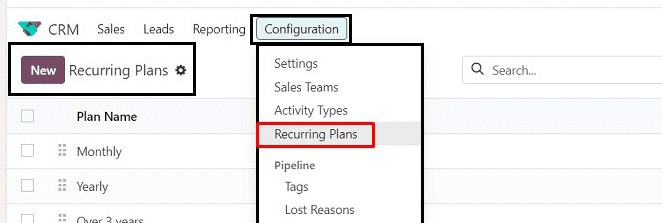
Apart from this method, you can also access the “Recurring Plans” window from the “Configuration” menu.
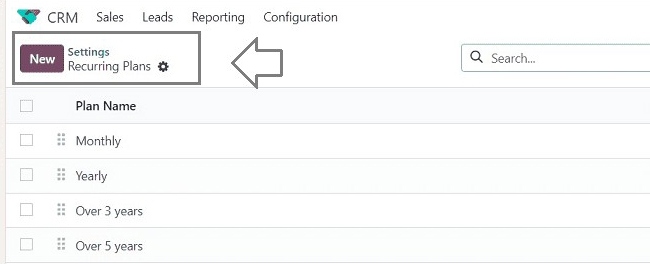
The 'Recurring Plans' window allows you to manage various types of recurring plans. It stores and displays all defined recurring plan data, including plan names and the duration in months. You can customise these details as needed. Additionally, if you want to rearrange the plans, you can simply drag and drop them using the six-dotted symbol shown in the image below.
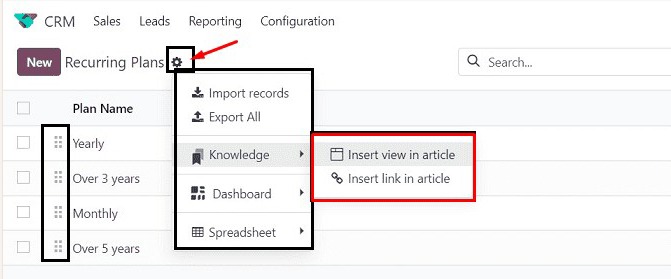
The 'Recurring Plans' window allows you to manage various types of recurring plans. It stores and displays all defined recurring plan data, including plan names and the duration in months. You can customise these details as needed. Additionally, if you want to rearrange the plans, you can simply drag and drop them using the six-dotted symbol shown in the image below.
To create a new Recurring Plan, simply click on the "New" button located in the upper left corner of the window. This action will automatically generate a new empty row within the same window. You can then proceed to input the necessary information for the new recurring plan.
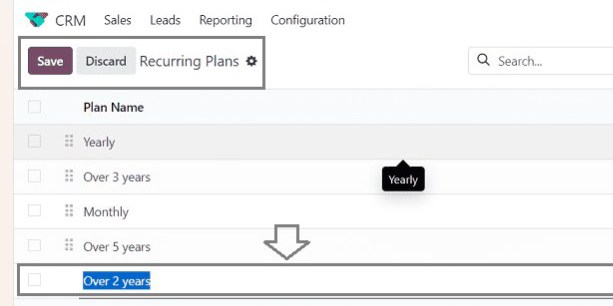
After saving the new plan using the “Save” icon, you can sort or filter the required details using the advanced search bar provided in the new Odoo 17.

After creating the new recurring plan, you can utilise it when creating new Opportunities or Pipelines. This feature enables you to set recurring plans and revenues for prospects, making it especially useful for managing ongoing commitments.
Setting Recurring Plans Inside Opportunities
To set recurring plans within Opportunities, you can easily create a new opportunity from the “My Pipelines” window to observe the application of the Recurring Plans. When configuring an opportunity record, the opportunity window displays fields for specifying these plans and revenues, as depicted in the image below.
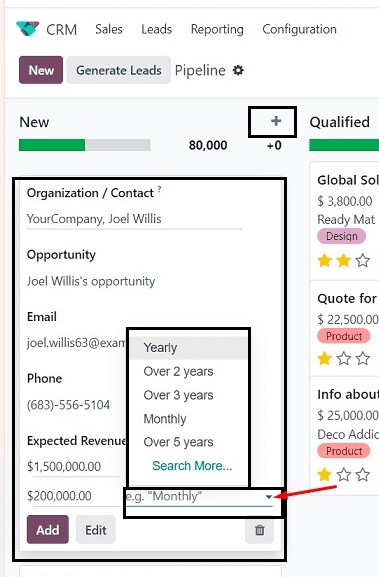
After creating the opportunities, you can see the recurring plans from the form view, and you can also change them according to the requirements.
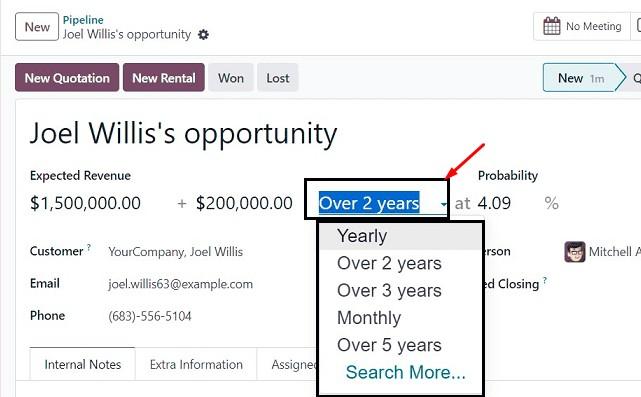
These functional overviews provide insight into the capabilities of the "Recurring Plans" feature within the Odoo 17 CRM Module.
Recurring plans within the Odoo 17 CRM module streamline revenue generation and billing processes. This functionality offers businesses a user-friendly and efficient way to manage ongoing commitments and optimise revenue streams.
Want to Customise Odoo for Your Business?
We can tailor Odoo to meet your specific needs.