Two-Step Receipt Process in Odoo 18
For companies that require multi-step operations to handle incoming and outgoing products, Odoo 18 Inventory offers a Multi-Step Routes feature to streamline these processes.
In the two-step receipt process, products are first received in an input area and then transferred to stock. This approach is ideal for warehouses with specific storage needs, such as freezers, secured areas, or designated aisles and shelves. With this setup, products can be sorted based on their storage locations, allowing employees to efficiently stock items allocated to similar areas. Until products are moved into stock, they remain unavailable for further processing.
Configuration
By default, Odoo Inventory processes both incoming and outgoing shipments in a single step. However, to switch to multi-step operations, follow these steps to enable the Multi-Step Routes feature:
- Go to Inventory app > Configuration > Settings.
- Under the Warehouse section, select Multi-Step Routes and click Save.
This setting also enables the Storage Locations feature for improved warehouse organisation and control.

Next, configure a warehouse for two-step receipts and deliveries:
- Navigate to Inventory app ‣ Configuration ‣ Warehouses, and select a warehouse to edit.
- Under the Warehouse Configuration tab, set Incoming Shipments to Receive goods in input and then stock (2 steps).

Note: Selecting two-step receipts and deliveries automatically creates new Input and Output warehouse locations in the database, named WH/Input and WH/Output. To rename or edit these locations:
- Go to Inventory app ‣ Configuration ‣ Locations, and select the desired location.
- On the location’s form, change the Location Name, and make any other necessary changes.
Process Receipt in Two Steps (Input + Stock)
When products are received in two steps, they first move from the vendor location to an input location. Then, they move from the input location to warehouse stock in the database, upon validation of a purchase order (PO), and a subsequent internal transfer.
Create a Purchase Order (PO)
To create a PO:
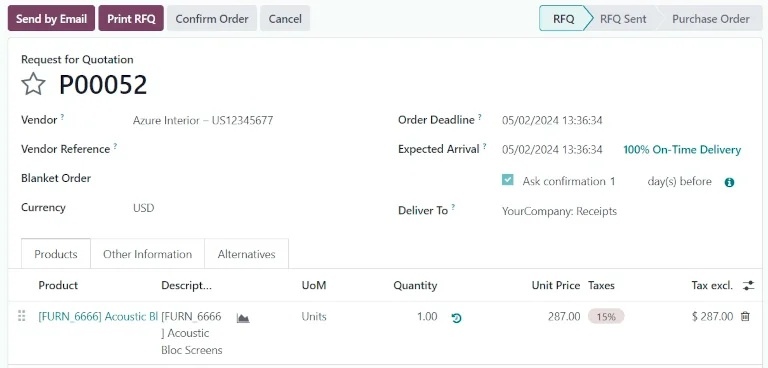
- Go to the Purchase app and click New. This opens a blank Request for Quotation (RFQ) form.
- Add a vendor in the Vendor field, and fill out other required fields on the RFQ as necessary.

- Under the Products tab, click Add a Product and select an item to add to the RFQ.
Once ready, click Confirm Order to move the RFQ to the Purchase Order stage.
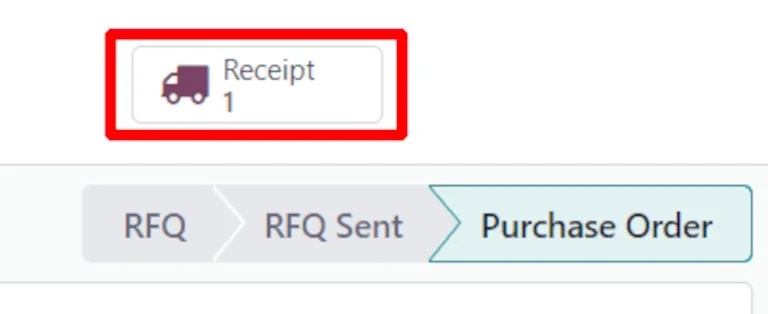
A Receipt button will then appear at the top of the form. Clicking the smart button opens the warehouse receipt (WH/IN) form.

Tip: For companies managing multiple warehouses with different step configurations, the Deliver To field on the PO form must specify the correct input location associated with the two-step warehouse.
This can be done by selecting the warehouse from the drop-down menu that includes the Receipts label at the end of the name..
Process Receipt
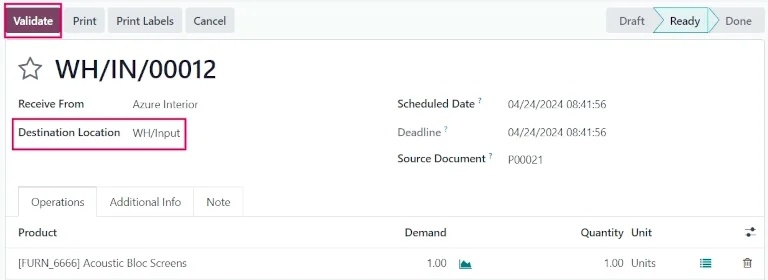
From the warehouse receipt form, products can be received into the input location of the warehouse. To complete this step:
- Click Validate on the receipt form. Once validated, the receipt moves to the Done stage, and the products move to the WH/Input location.

- Return to the PO form (via the breadcrumbs, at the top of the form) to view it. On the product line, the quantity in the Received column now matches the ordered Quantity.
Process Internal Transfer
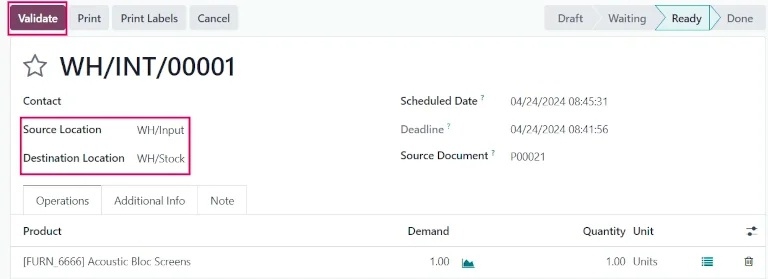
Once the receipt is validated, an internal transfer is created and is ready for processing:
- To view the internal transfer, go to the Inventory app, and locate the Internal Transfers task card.
- Click the # To Process button on the task card to view all pending internal transfers, and select the transfer associated with the validated receipt.
- Click Validate to complete the transfer, and move the products from WH/Input to WH/Stock.
After validation, products are added to inventory and are now available for customer deliveries or manufacturing orders.

Wrap-Up
The two-step receipt process in Odoo 18 provides companies with a more structured and organised method of managing inventory. Utilising this setup, businesses can control the flow of products through designated areas, making warehouse operations more efficient. Following the steps outlined in this article, you can ensure a smoother and more organised receiving process tailored to specific storage needs.