Custom Email Setup in Odoo
Our customers who use custom Outlook Exchange servers often need to configure these within Odoo as Incoming Mail servers. They also requested to set up our Outlook email as a catch-all mail in Odoo. We have successfully fulfilled this configuration, and our clients are satisfied with our solution. This guide walks you through successfully configuring both.
Configuring Outlook Exchange Server in Odoo
Follow the steps below:
1. Enable Developer Mode
First, enable developer mode (debug mode) and go to Settings > Technical > Email > Incoming Mail Servers.
2. Create a New Record
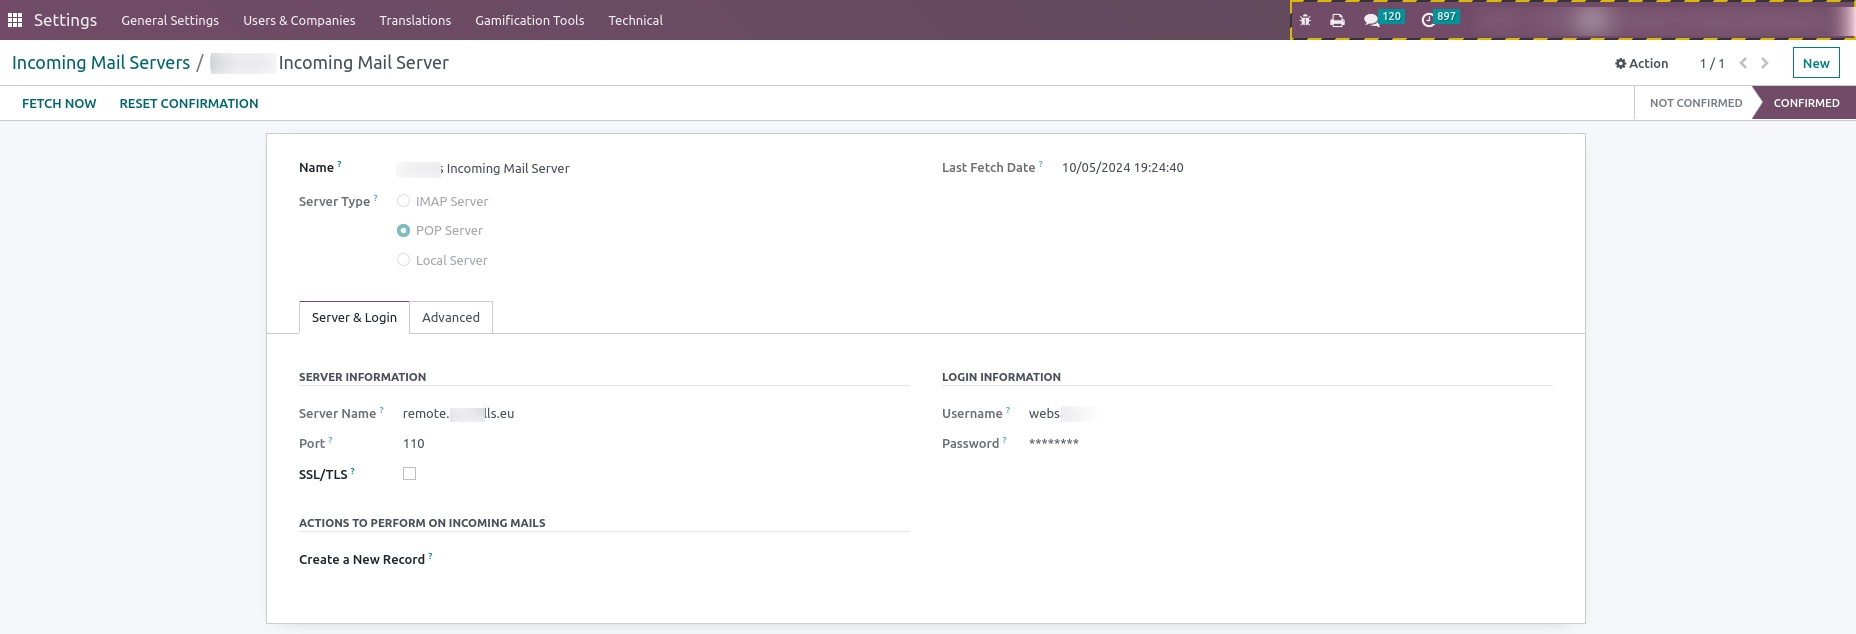
Create a new record and fill in the following required information:
- Name: Name of the incoming mail server (Any)
- Server Type: POP Server
- Server Name: Outlook Exchange server (e.g., remote.numla.com)
- Username: Outlook Exchange server email login
- Password: Outlook Exchange server email password
- Port: 110
3. Test the Connection
After saving the record, click the "Test & Confirm" button to check if the connection is successful. If the connection is not successful, a warning will be displayed with the reason. Otherwise, the record will be moved to the confirmed stage.
4. Fetch Emails Manually
After the records are confirmed, the "Fetch Now" button will be visible. This button allows us to manually import emails from the configured mail to Odoo.
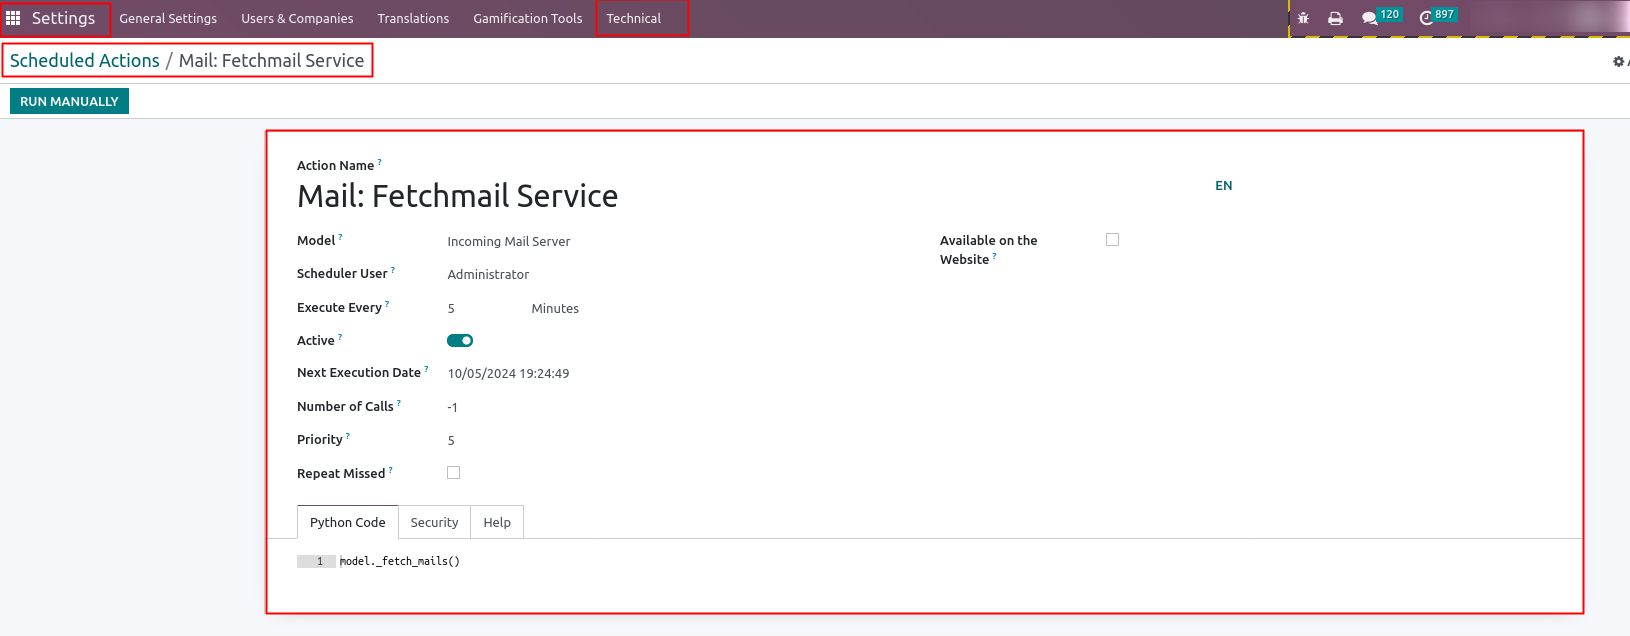
5. Automate Email Retrieval
Odoo offers a convenient feature that automatically retrieves emails from Outlook Exchange mail servers and brings them into Odoo. To activate this automation, navigate to Settings > Technical > Automation > Scheduled Action and locate "Mail: Fetchmail Service." Then, simply enable this automation. You can customise the timing to suit your preferences as well.
Configuring Custom Catch-All Email in Odoo
- Configure a custom catch-all email by navigating to Settings > Technical > Parameters > System Parameters
- Locate "mail.catchall.alias" and "mail.catchall.domain".
2. Set Mail Catch-All Alias and Domain
Fill in the information as per the instructions below:
- "mail.catchall.alias": Enter the email alias, such as info, sales, numal, mayurv, etc. This corresponds to the part before the "@" symbol in the email address.
- "mail.catchall.domain": Enter the suffix part of the email, such as numla.com, mayurv.com, facebook.com, etc. This corresponds to the part after the "@" symbol in the email address.

Configuring the Outlook Exchange server and setting up a custom catch-all email in Odoo ensures seamless email management. By following these steps, you can streamline your email operations and enhance communication efficiency within your organisation.