What Are Odoo Workflows?
Odoo workflows represent a series of steps or stages that define the lifecycle of a business process, such as a sales order, purchase order, or project task. Workflows are built into many Odoo applications, making it easy for businesses to track and manage the flow of their data.
For example, in a sales workflow, a sales order can move through various states like "Draft," "Confirmed," "Invoiced," and "Done." Each transition between these states is controlled by predefined logic, and custom logic can be added with Python to ensure workflows behave according to your business rules.
Key Workflow Components
- States: Represent the stages or phases of a process (e.g., "draft," "confirmed," "done").
- Transitions: Define how records move from one state to another.
- Conditions: Specify the criteria that must be met for a transition to occur.
- Actions: Trigger automatic actions like sending an email or generating a report upon state changes.
Customising Odoo Workflows with Python
Odoo's flexibility and customisation options make it a great choice for businesses looking to automate workflows across various departments. But as businesses scale and processes become more complex, managing Odoo workflows may require advanced logic that goes beyond Odoo’s standard functionality. This is where Python becomes essential for customising workflows to meet specific business needs.
This article explores how to manage Odoo workflows and leverage Python to implement advanced workflow logic. It covers how to create custom workflows, trigger actions based on conditions, and integrate Python code into workflow transitions for more control.
Creating Custom Workflows in Odoo
By default, Odoo’s workflows allow basic state transitions through fields. Selection and @api.model or @api.onchange decorators. However, when more complex business rules are required, Python can be used to create dynamic workflows, enforce transitions, and automate actions.
Step 1: Define Workflow States Using fields.Selection
You can define the states of your workflow using the Selection field in Odoo. Let’s say you’re creating a custom workflow for a project task:
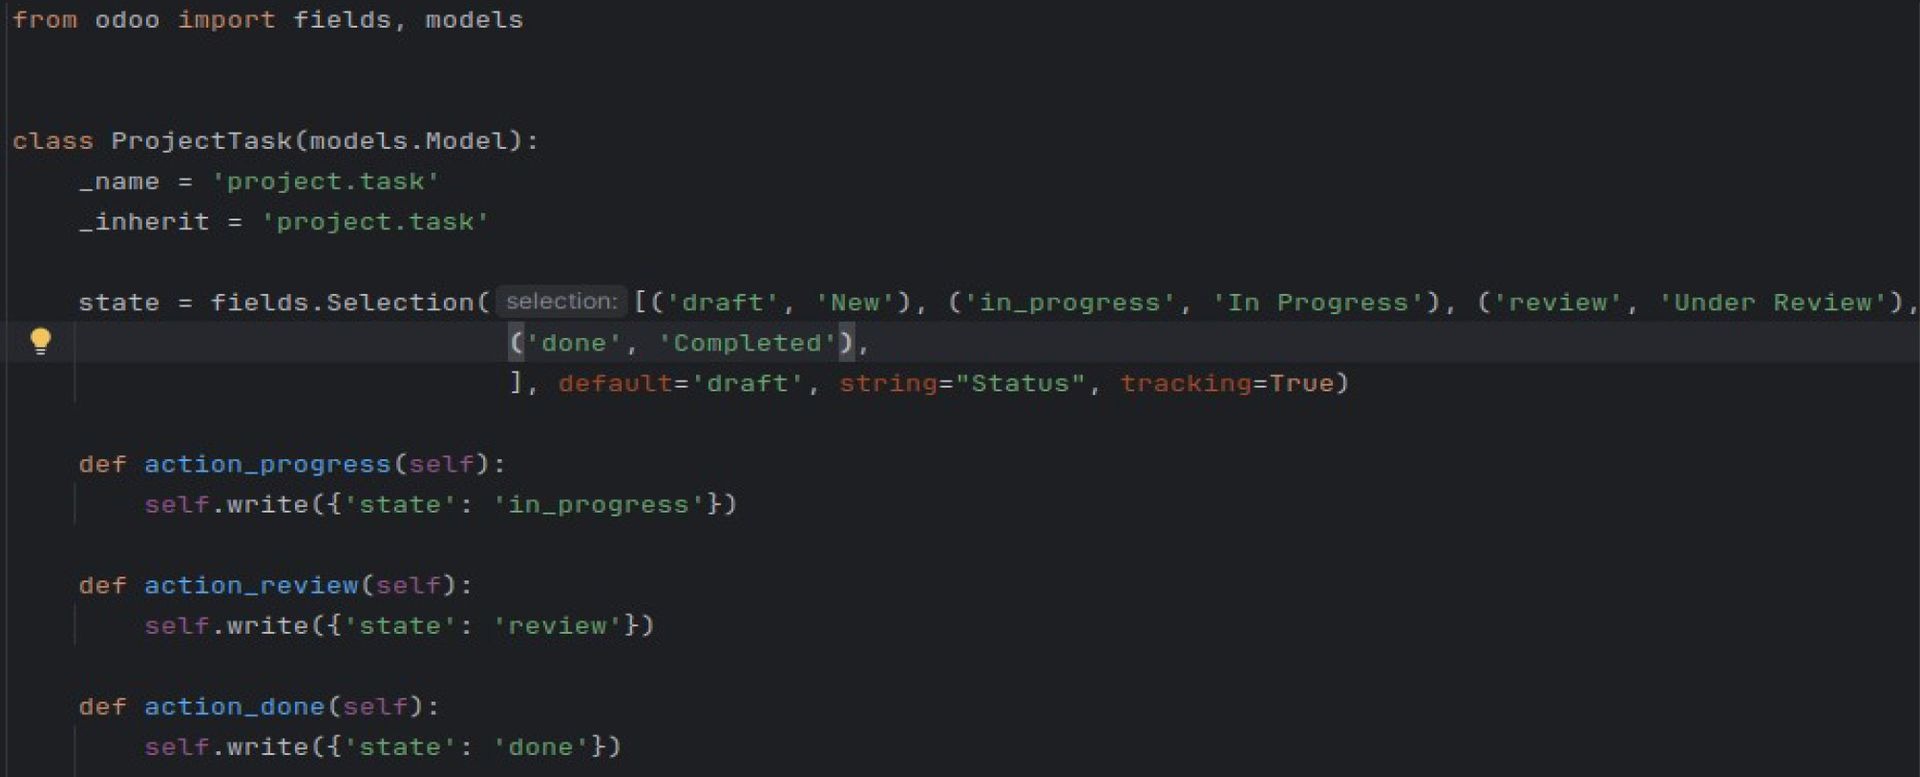
In this example, four states are defined for the task: “New,” “In Progress,” “Under Review,” and “Completed.” Each state can be transitioned by clicking corresponding buttons, which are defined using action methods.
Step 2: Adding Buttons for Workflow Transitions in the Form View
To allow users to transition between workflow states, you can define buttons in the form view. The button actions are tied to methods that handle state transitions.
Here’s how you add buttons to the task form view:
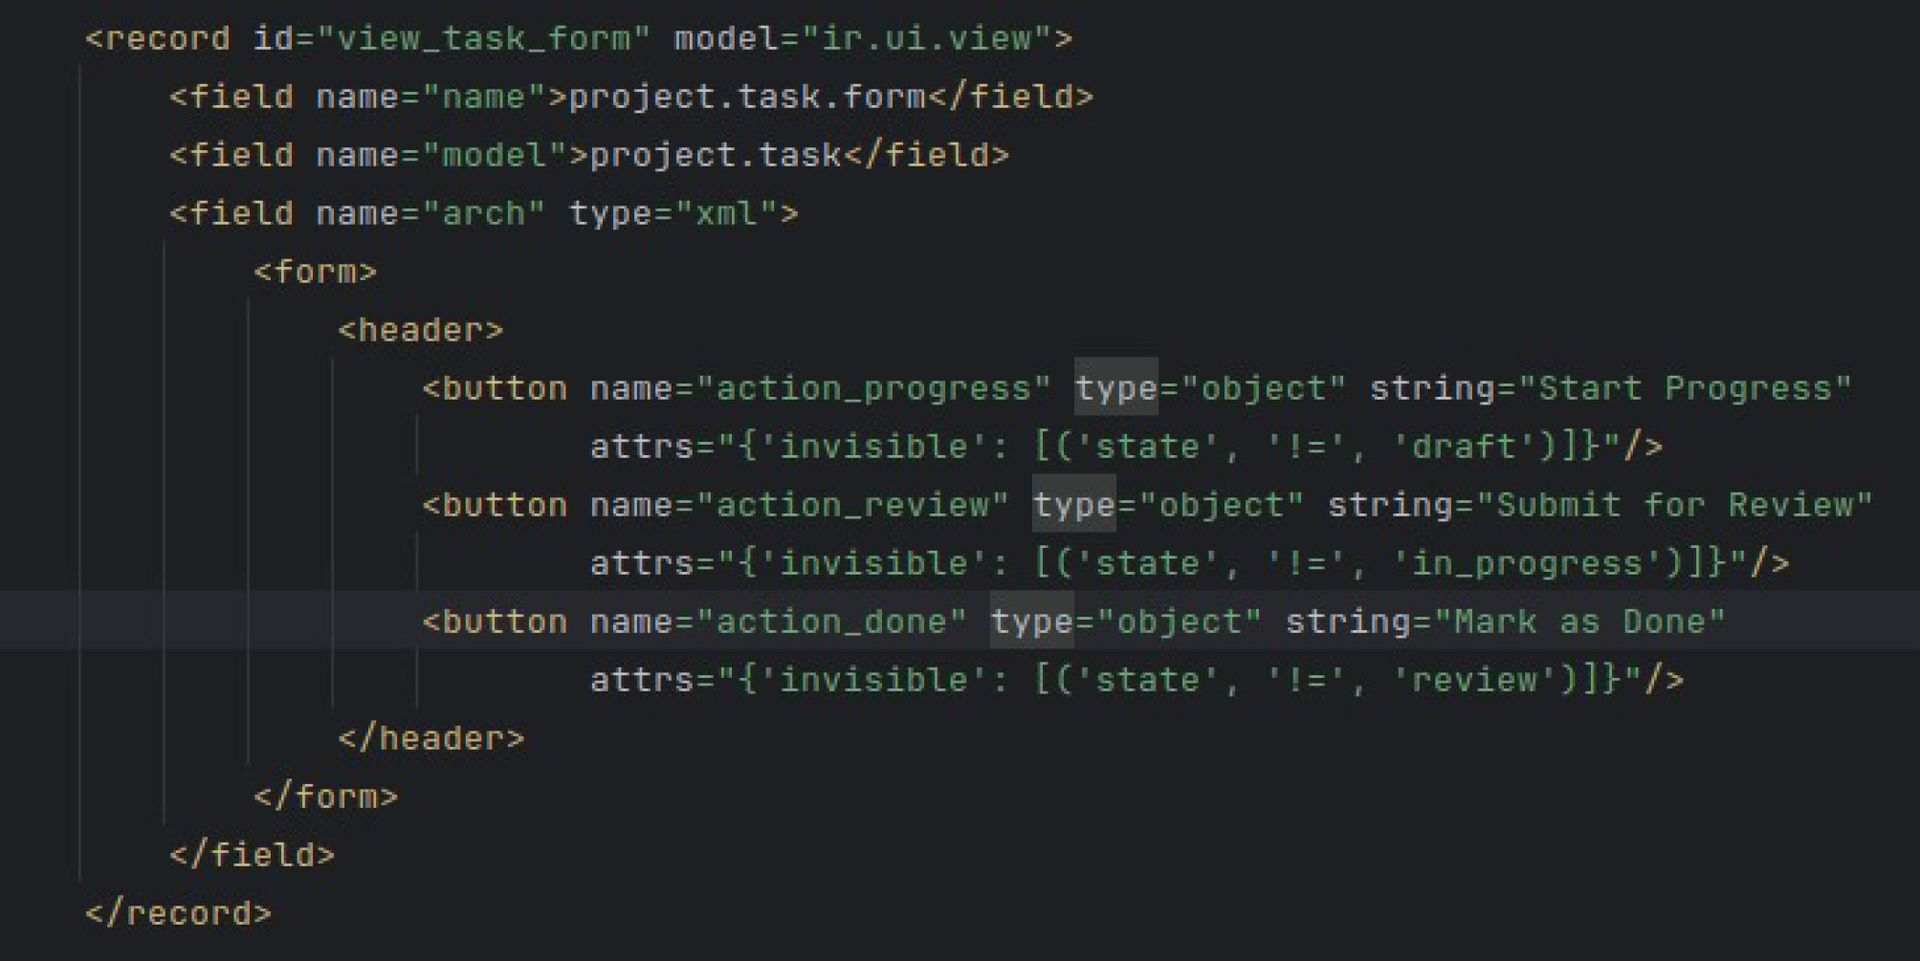
Here, buttons appear conditionally depending on the current state of the task. For instance, the “Start Progress” button is only visible when the task is in the “Draft” state.
Advanced Workflow Logic Using Python
While basic state transitions can be handled by buttons and methods, more advanced logic is often needed. You can use Python to add conditions, automate actions, or trigger validations based on workflow states.
Step 3: Using Python to Enforce Transition Rules
You can restrict state transitions or perform validation checks using Python before allowing a transition. For example, let's ensure that a task cannot be moved to the "Under Review" state unless the hours_logged field exceeds 10:
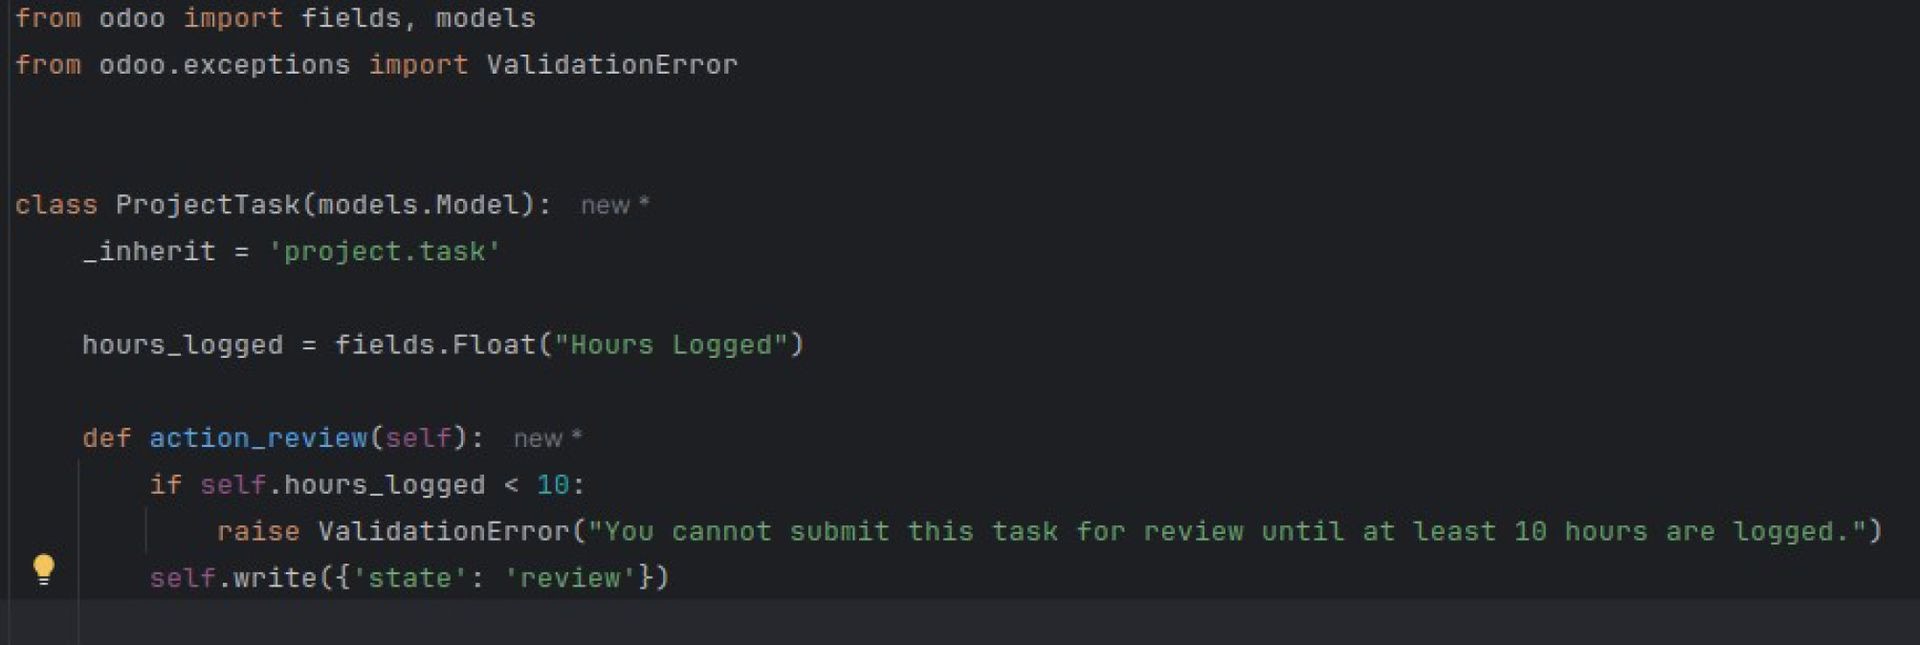
Here, Python is used to raise a ValidationError if a condition isn’t met before transitioning to the next state.
Step 4: Triggering Actions on Workflow Transitions
Odoo allows you to trigger automated actions whenever a state transition occurs. For example, when a task is marked as “Completed,” you might want to send a notification to the project manager:

In this case, an email is automatically sent to the project manager whenever a task is marked as “Done.”
Step 5: Automating Transitions with Cron Jobs or External Events
Sometimes, transitions need to be triggered automatically without user input. You can automate transitions using cron jobs or external triggers.
For instance, you could create a cron job that automatically moves tasks from “In Progress” to “Under Review” if they haven’t been updated for a week:
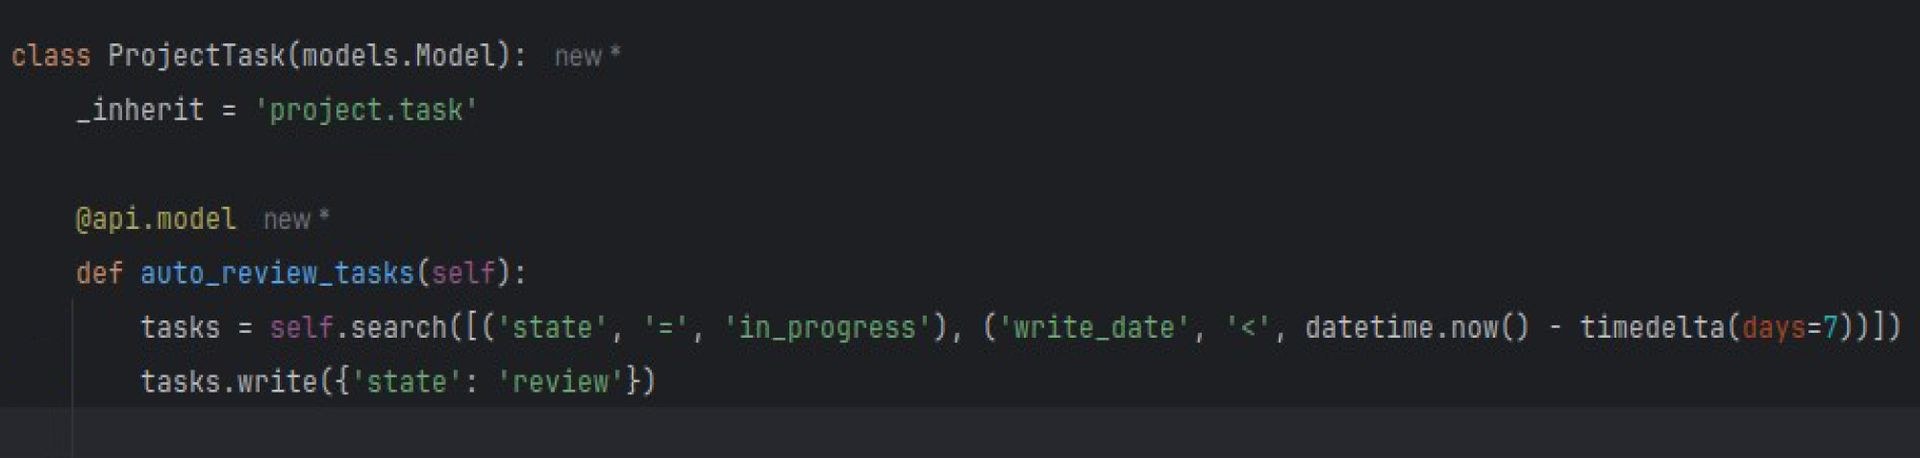
To make this automation run periodically, you would create a cron job in Odoo's Automated Actions or Scheduled Actions module.
Best Practices for Managing Odoo Workflows
Keep Workflows Simple
Start with simple state transitions and add complexity as needed. Over-complicating workflows can make debugging and maintenance more difficult.
Use Custom Python Logic
When built-in functionality doesn’t meet your needs, leverage Python to validate conditions, automate actions, or enforce rules.
Automate Where Possible
Automating workflow transitions using cron jobs or external events can help streamline operations and reduce manual intervention.
Test Thoroughly
Always test workflow logic in a development or staging environment before deploying it to production. State transitions and validation logic should be bulletproof, as errors can halt critical business processes.
Wrap-Up
Managing workflows in Odoo using Python provides the flexibility and control needed to handle complex business processes. Whether you're creating simple state transitions or implementing logic to automate transitions and enforce rules, Python is an essential tool for managing Odoo workflows.
By customising workflows with Python, you can ensure that your business processes flow smoothly and that specific business requirements are met efficiently. Whether you’re managing sales orders, purchase requests, or project tasks, understanding how to authority Odoo workflows with Python can greatly improve your ability to customise and streamline business operations.