by Dharmesh Patel
Managing invoice communication efficiently is crucial for businesses to maintain healthy customer relationships. Many businesses face challenges in ensuring timely communication with customers regarding validated invoices. Manually sending out invoice emails can be time-consuming, prone to errors, and may lead to delays in customer notifications.
In this article, we'll address the problem of delayed invoice communication and provide a solution using Odoo's Automated Action feature.
Automated Actions in Odoo
Configuring automated actions in Odoo streamlines the process of sending invoice emails upon validation. Odoo allows you to define automated actions using the "Automated Actions" feature.
Here's a step-by-step guide to help you configure this automated action:
1. Access your Odoo/System Instance
- Log in to your Odoo instance.
- Ensure that you have the Administered access rights to configure Automated Actions.
2. Install the "Automated Action Rules" App/Module (If Applicable)
- Go to the Main dashboard.
- Click on the "Apps" module.
- Search for "Automated Action Rules" and click the “Install” button to install it.

3. Create a New Automated Action Record
- Go to, Settings → Technical → Automation → Automated Actions
- Click on the "CREATE" button to create a new automated action.
- Fill in the required fields in the form:
- Name: Give your automated action a descriptive name(e.g., Journal Entry: Automatic send email to customer on posting invoice).
- Model: Choose the model for which the automated action is intended (e.g., Journal Entry<account.move)).
- Trigger: On Update
- Trigger Fields: Status(account.move)
- Before Update Domain: Set the condition ["&",["move_type","=","out_invoice"],["state","=","draft"]] that will trigger the action.
- Apply On: Set the condition ["&", ("move_type", "=", "out_invoice"), ("state", "=", "posted")] that will trigger the action.
- Action To Do: Choose "Send Email".
- Email Template: Choose “Invoice: Send by email”.
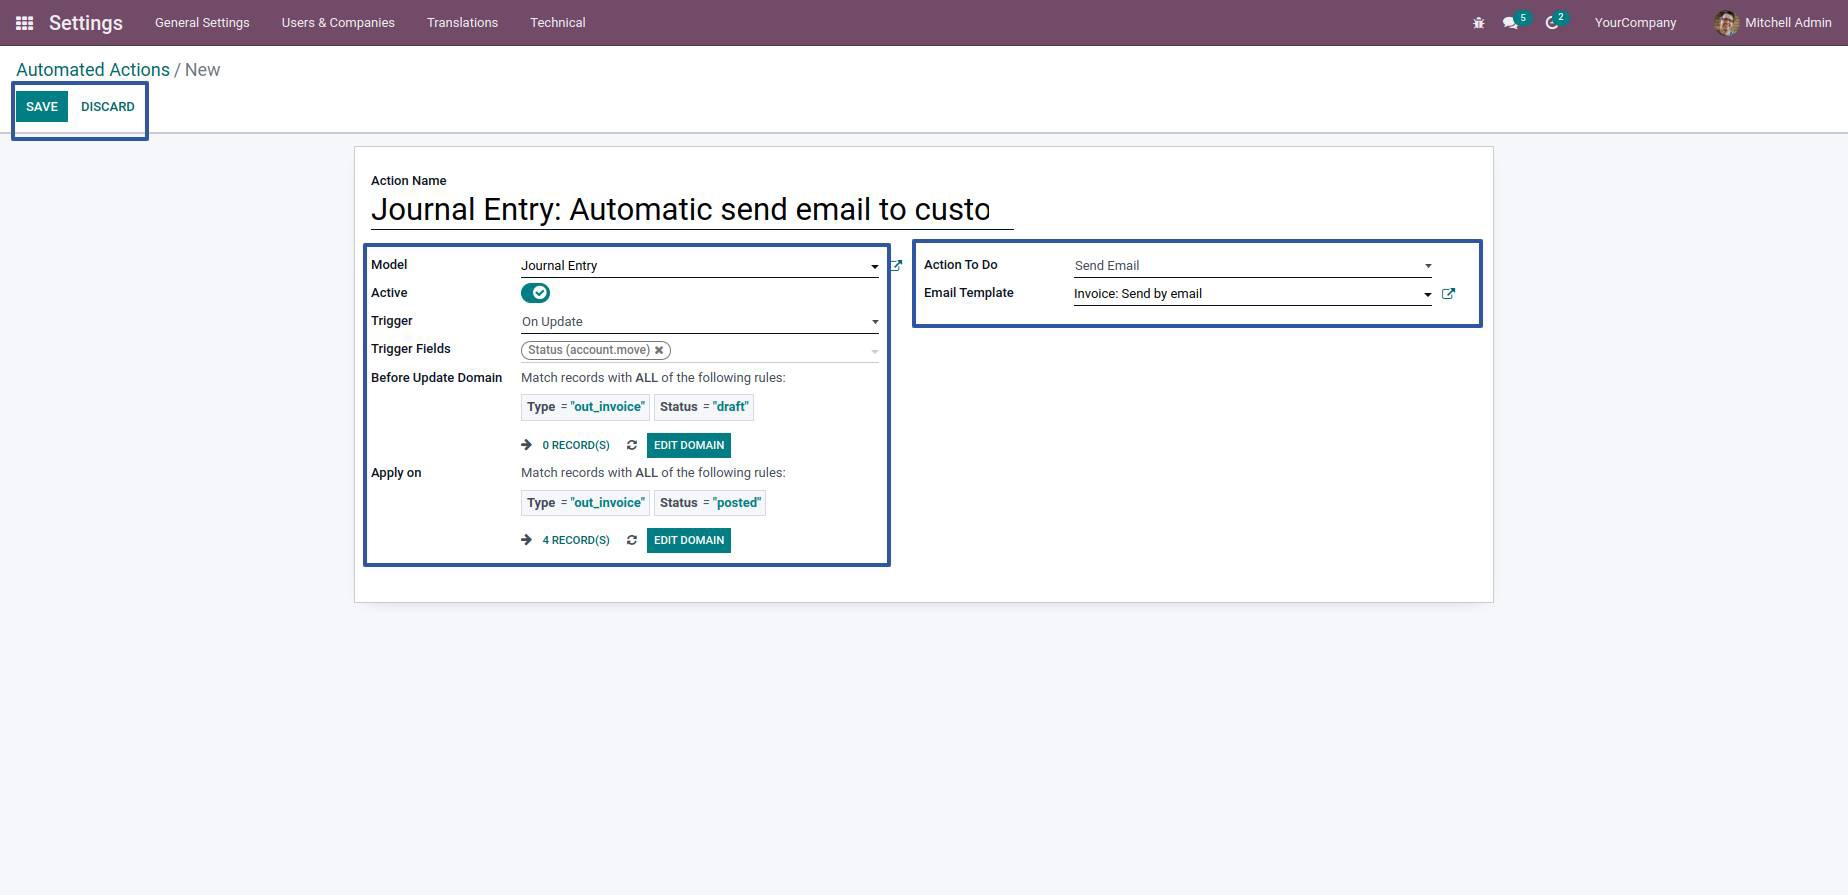
- Save your configurations.
- Make sure to activate the automated action.
4. Test the Automated Action
Create or validate an invoice to test whether the automated action triggers and sends the email.
Note: The exact steps and options may vary slightly depending on your Odoo version and configuration.
You can avoid delayed invoice communication by following these steps. This will not only save time and reduce errors but also enhance overall customer satisfaction by ensuring timely and accurate communication regarding validated invoices. As a result, you can build stronger customer relationships and improve your overall invoicing processes.