Custom Reports in Odoo
by Khurram Iftikhar
Generating reports is one of the key features available in Odoo. With Odoo, you can create reports on various aspects of your business, helping management analyse operations and gain valuable insights. These reports can also guide you in adjusting your business processes based on the data provided. Additionally, Odoo supports forecasting reports, helping predict different business outcomes.
Odoo is highly customisable, allowing you to tailor it to your business needs. An experienced Odoo developer can help you configure it to match your specific operational methods. Although Odoo is an open-source ERP solution that can be customised, its core functions and standardised procedures remain intact.
Using Odoo Studio
Odoo Studio is another tool within the platform that lets you further customise features as needed. With Odoo Studio, you can create new applications and modules or modify existing ones without needing to code. The tool allows you to drag, drop, and configure functional blocks easily.

Report Customisation
Report customisation is a powerful feature in Odoo Studio, giving you the tools to tailor reports to your needs. While Odoo can already generate standard reports, custom reports provide even more value by allowing you to fine-tune the data for better business insights. Currently, Odoo Studio is available in the enterprise edition, helping businesses build advanced functionality with no coding required.
Creating Custom Reports
Let's talk about creating custom reports in Odoo Studio:
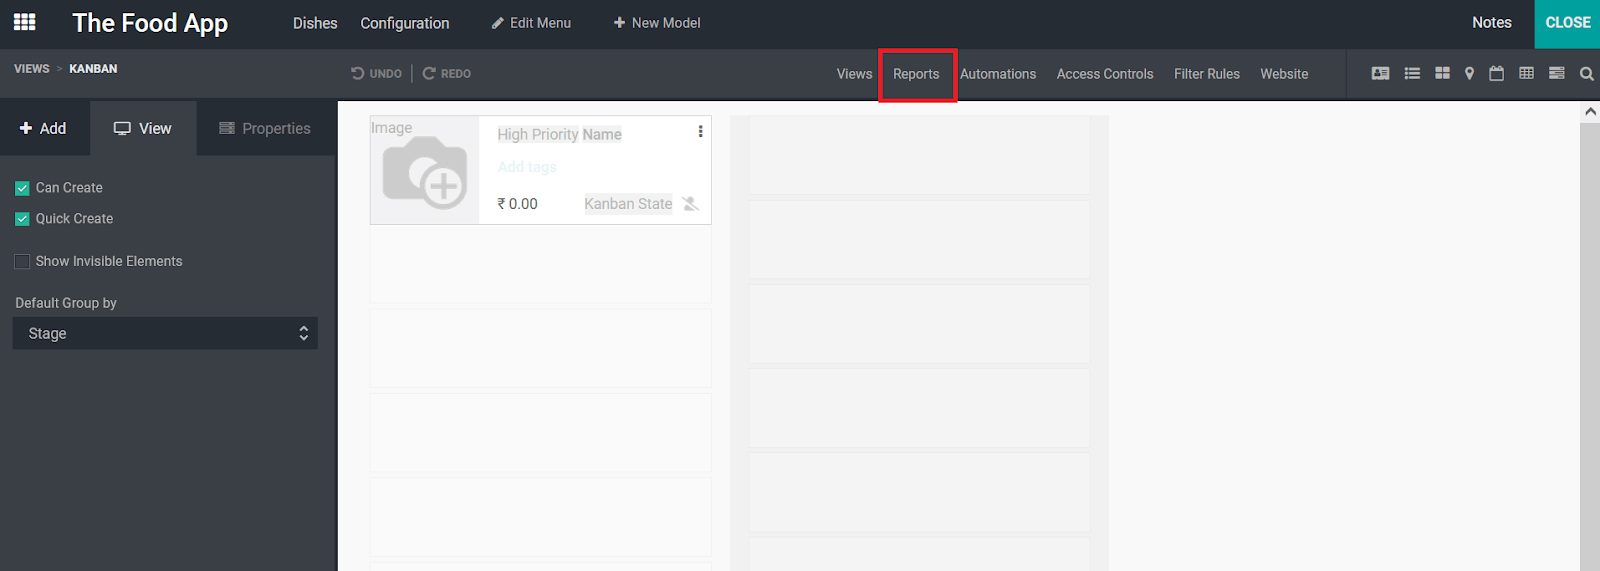
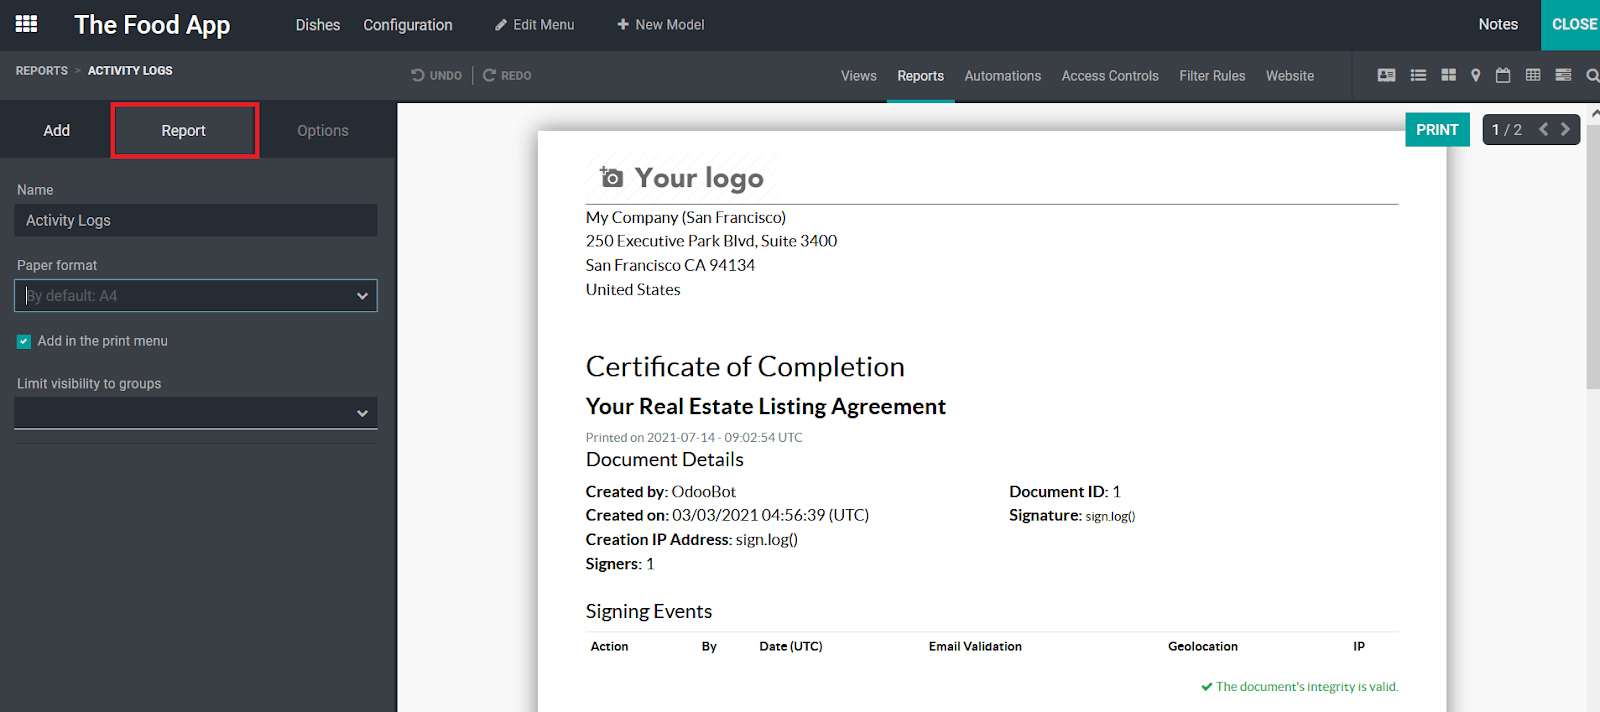
1. Select the Module
With Odoo Studio, you can customise existing modules or create new ones. To create a new module, select the "Reports" menu. To customise an existing one, click the Studio icon on your Odoo dashboard.
2. Choose Report Format
After selecting the module, a pop-up will ask you to choose the type of report format—External (with header/footer), Internal (minimal header/footer), or Blank (no header/footer).

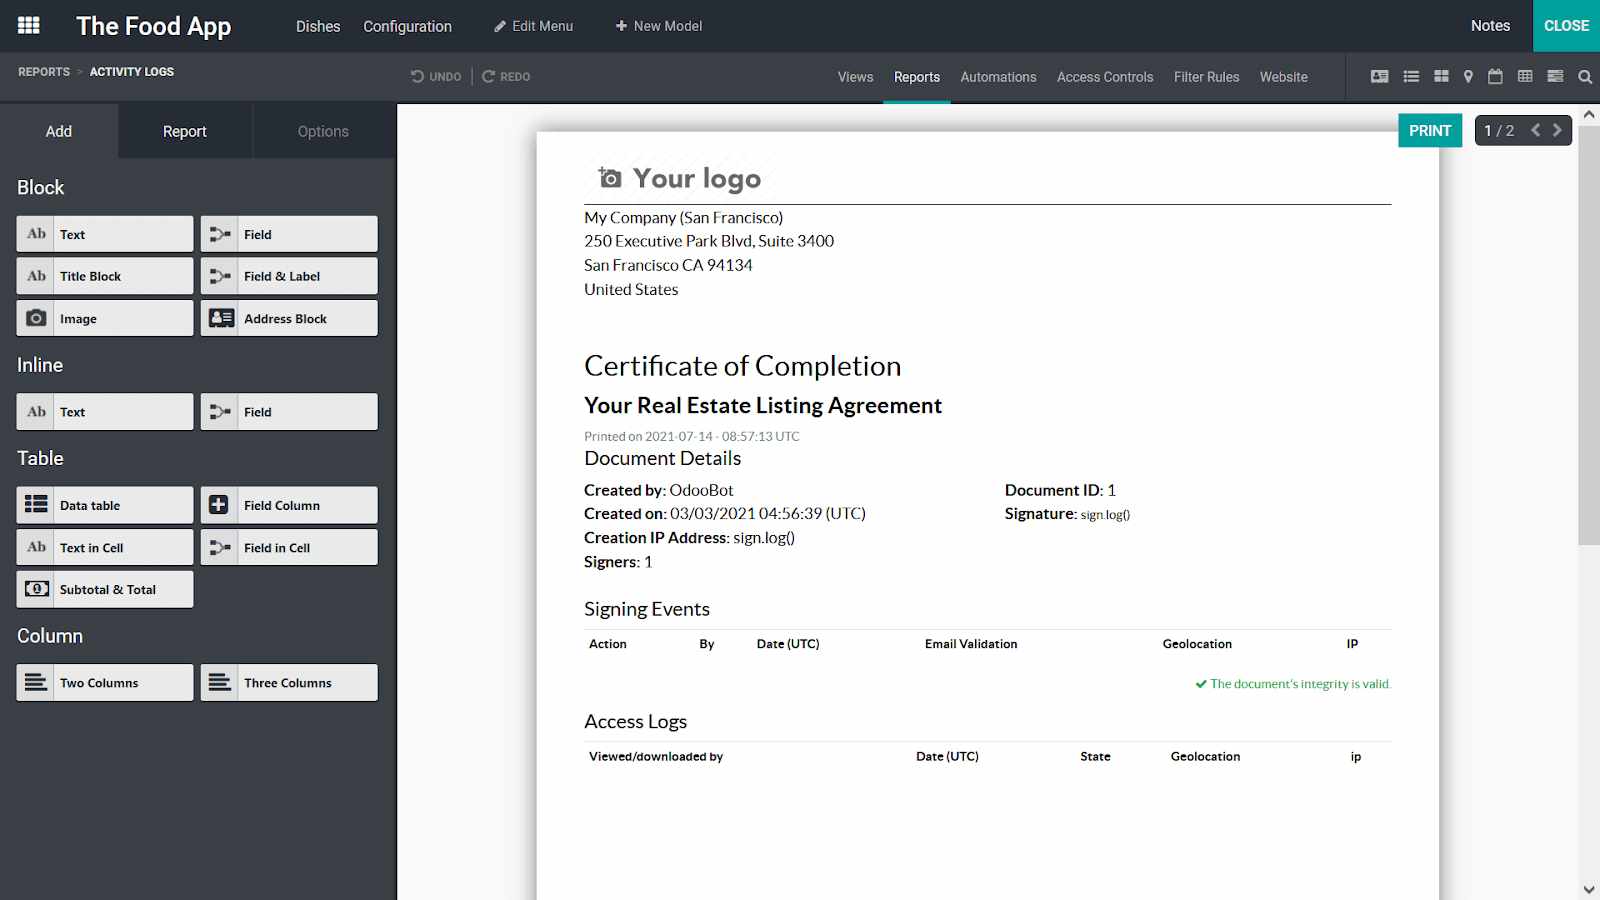
3. Customise Your Report
Once the report type is selected, you'll see a sample report. If no data is available, you'll need to configure some data first. After that, you can start customising the report. The "Add" menu allows you to configure different elements like blocks, tables, and columns.
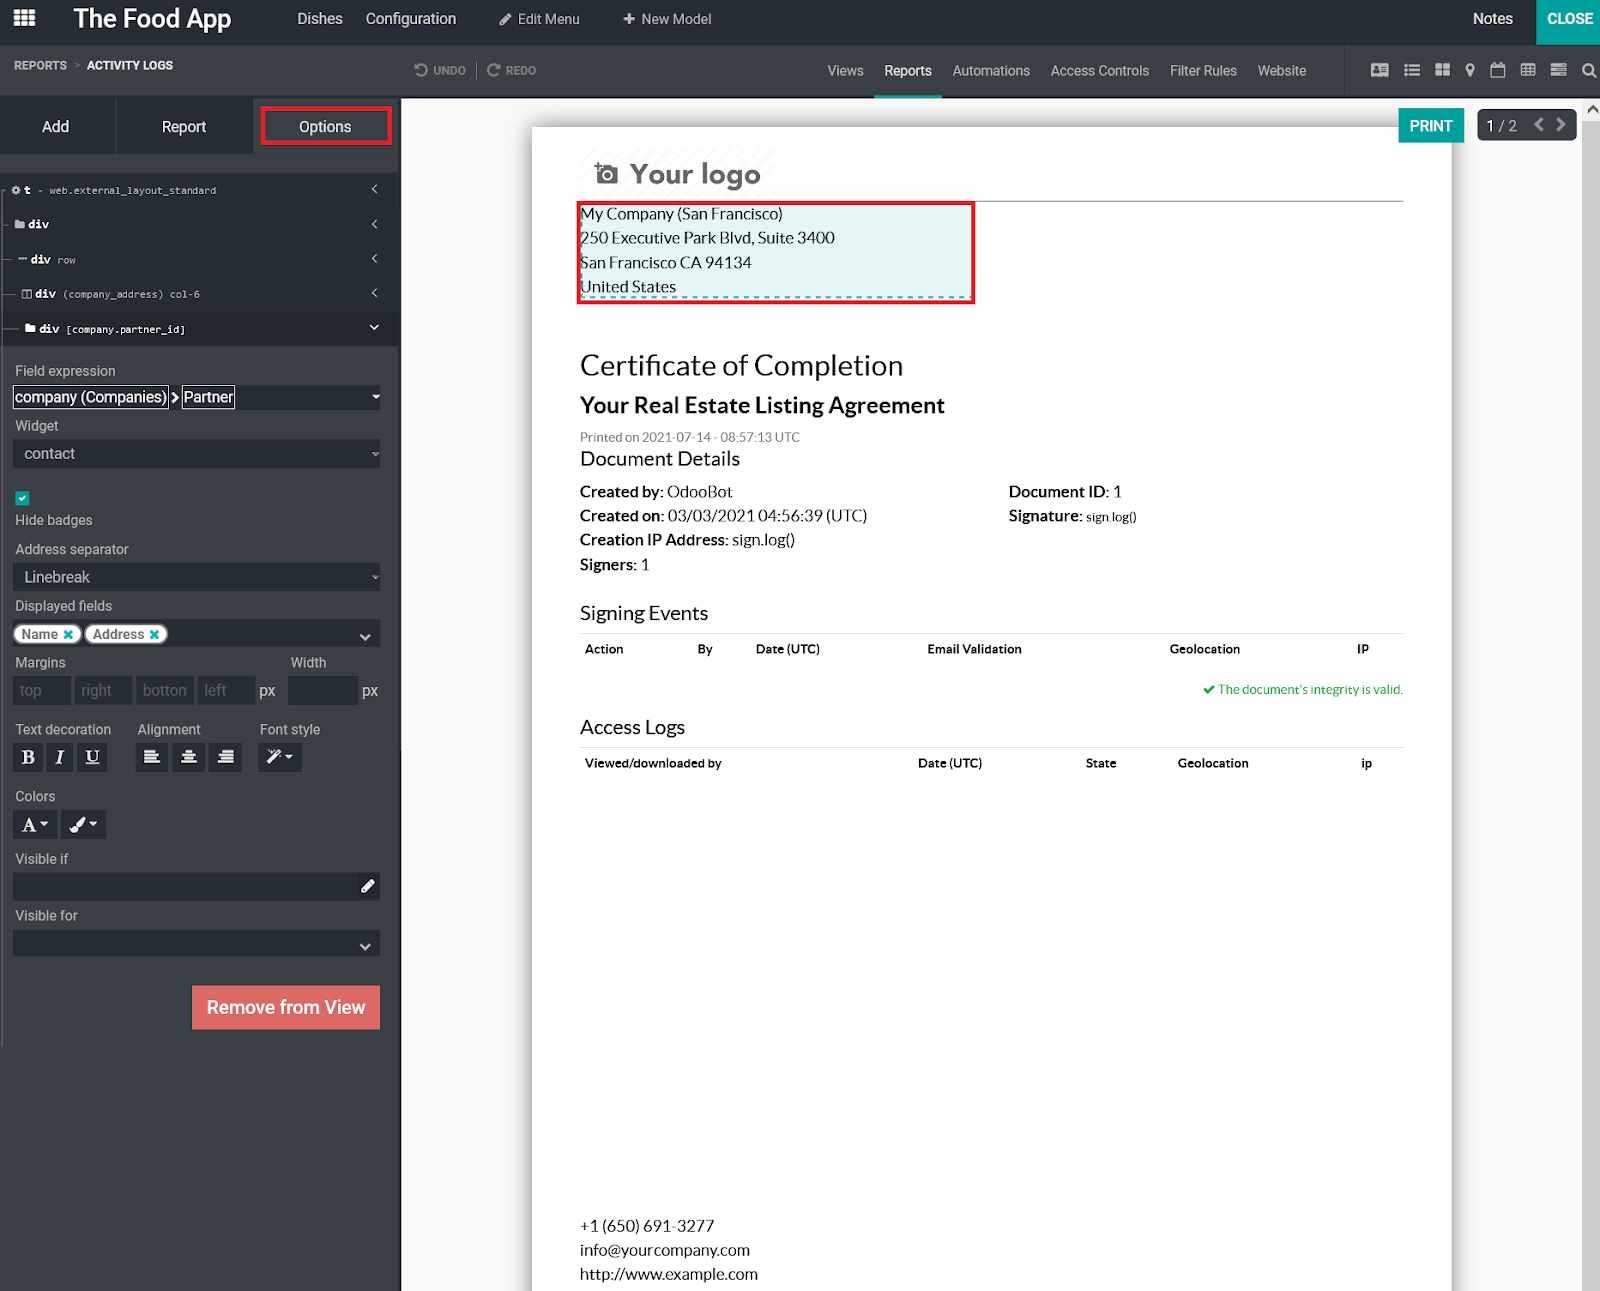
4. Advanced Features
You can further tweak the report with the "Options" menu, or if you're familiar with coding, use the HTML editor to add more advanced features. You can adjust fields like margins, fonts, text alignment, and visibility options.
5. Final Steps
Finally, you can name the report and choose the paper format for printing. You can also limit who can see the report by adjusting visibility options.
These are the basic steps to creating custom reports in Odoo. With the Studio app, you can even set up reports to generate automatically based on the configurations you've defined.
Enhance Your Odoo Experience
Streamline your operations. Let Numla help you implement Odoo effectively.