Employee App

Sections

Getting Started

Features


In this section, we will quickly walk through the key features of the Employees app, designed to simplify HR management tasks and boost productivity. From managing employee profiles to generating insightful reports, this app offers a range of tools to streamline your workflow. Take a closer look at the following features sorted by alphabetical order:

Features Description
Annual Leave Balances Track and manage employee annual leave entitlements.
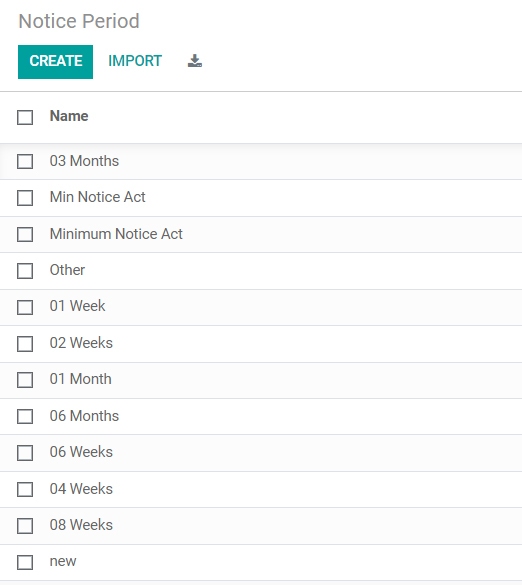
Automate Notice Periods Set up automated notice periods for contract terminations.
Badge Grants and Employee Challenges Grant badges and launch employee engagement challenges.
Benefit-in-Kind (BIK) Record and manage employee benefit-in-kind requests.
Bonus Types and Management Define and manage different types of bonuses.
Carry Forward Leaves Allow employees to carry forward unused leave balances.
Centralised Document Storage Attach documents directly to employee profiles.
Comprehensive Feature to Configure and Automate Allowances and Deductions Automate the processing of allowances and deductions.
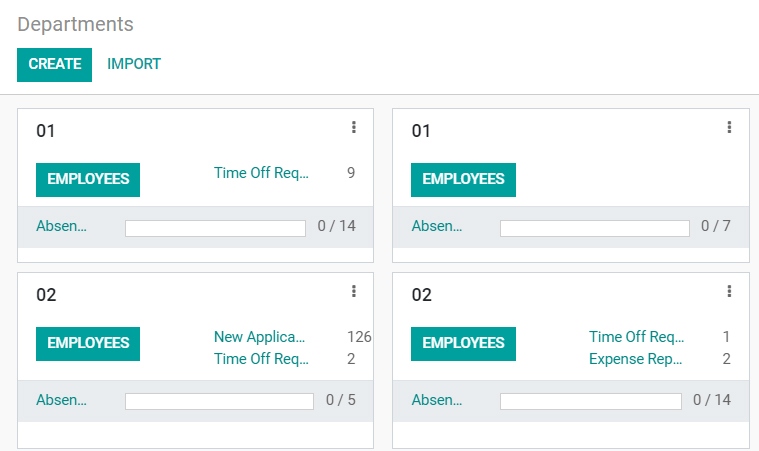
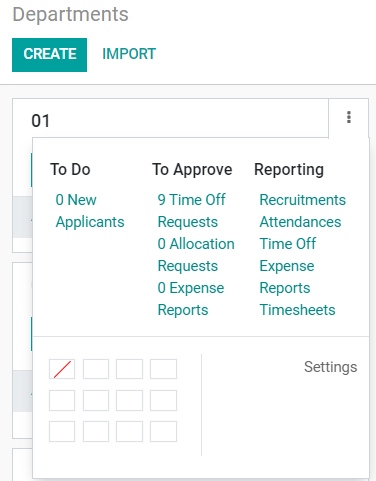
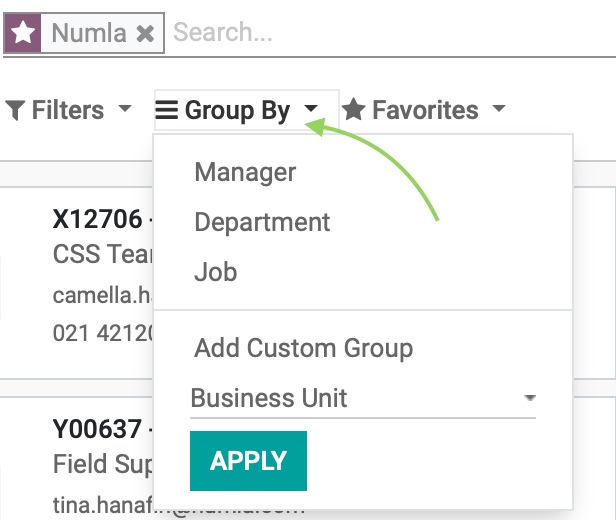
Organisational Charts Configure and view organisational charts and departmental structures.
Contact Types and Cost Centers Define contact types and cost centers for employees.
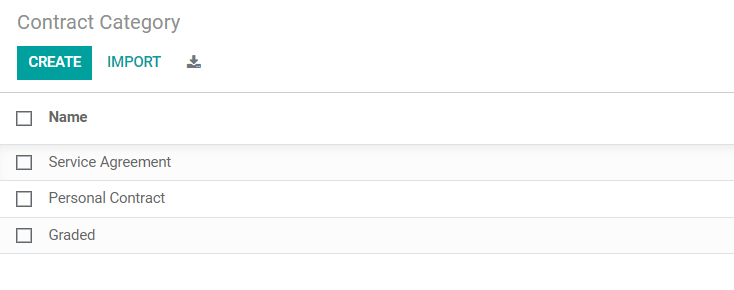
Contract Amendments Easily manage changes to employee contracts.
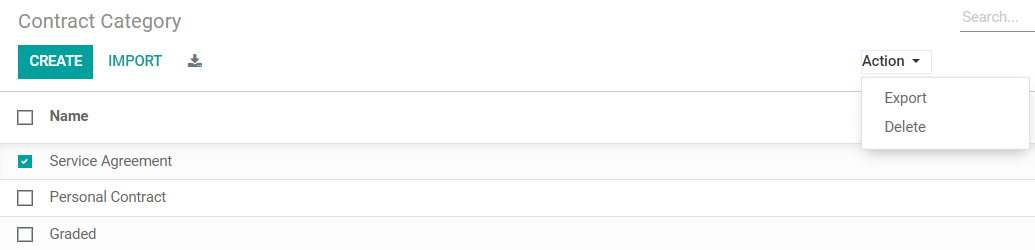
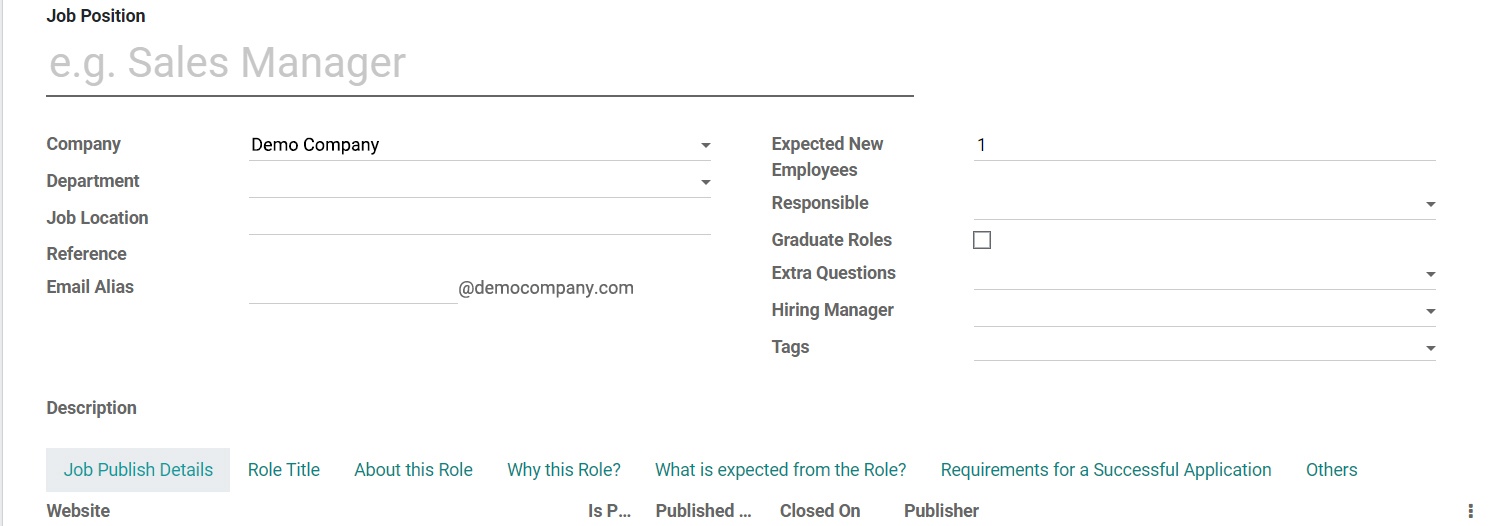
Contract Recording and Maintenance Record, maintain, and view contract details.
Delegation Setup Set up delegations for various tasks and responsibilities for employees.
Directors and Senior Management Setup Securely configure profiles for directors and senior management and use them in different workflows.
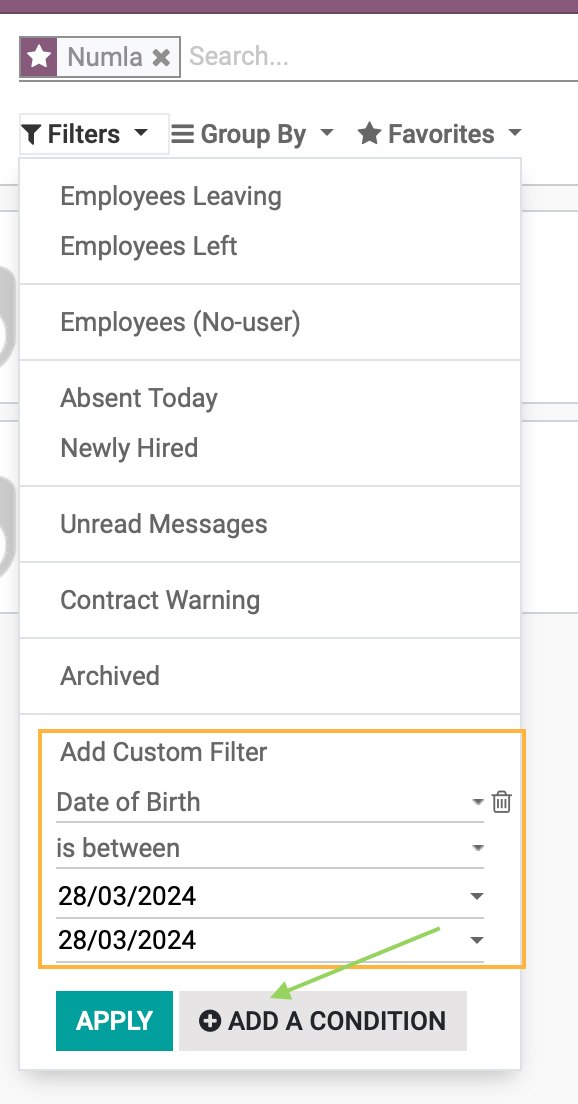
Employee Directory Access a directory of all employees within the organisation.
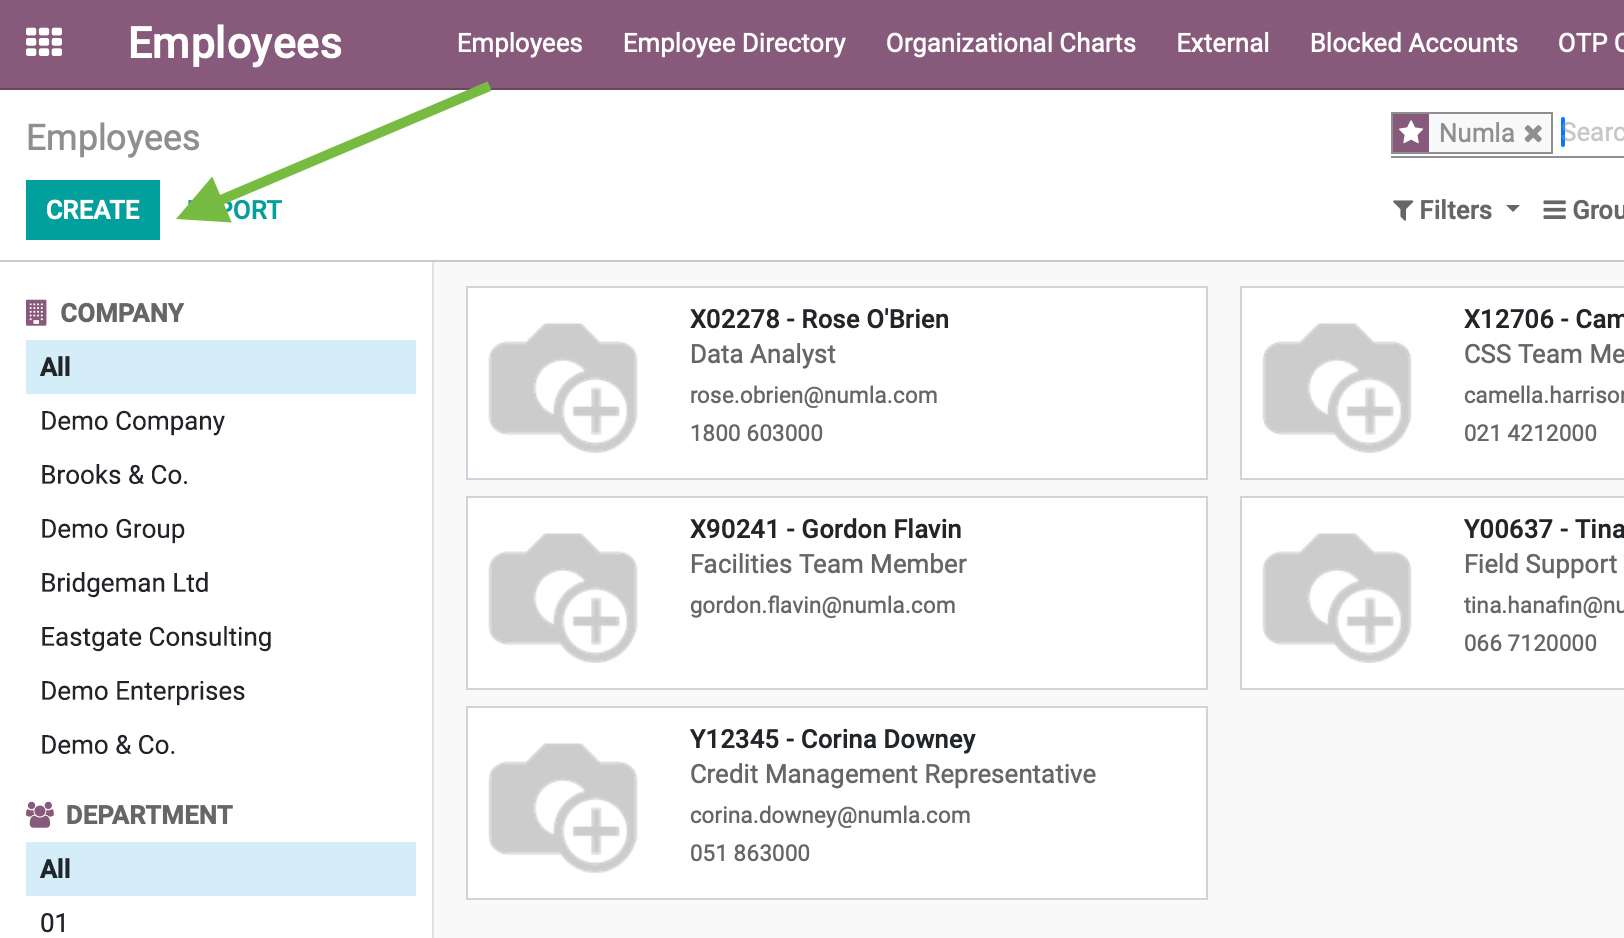
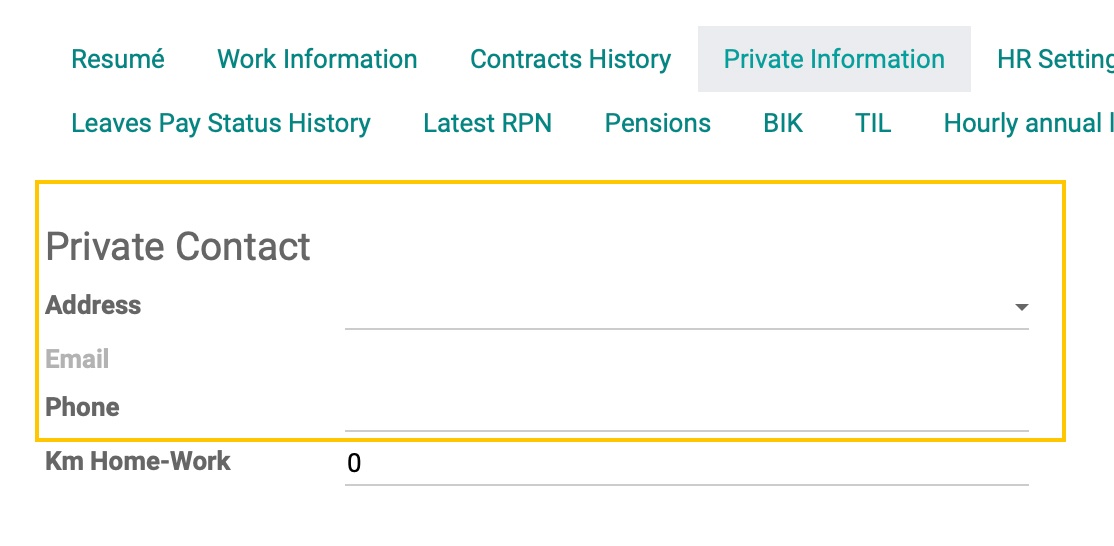
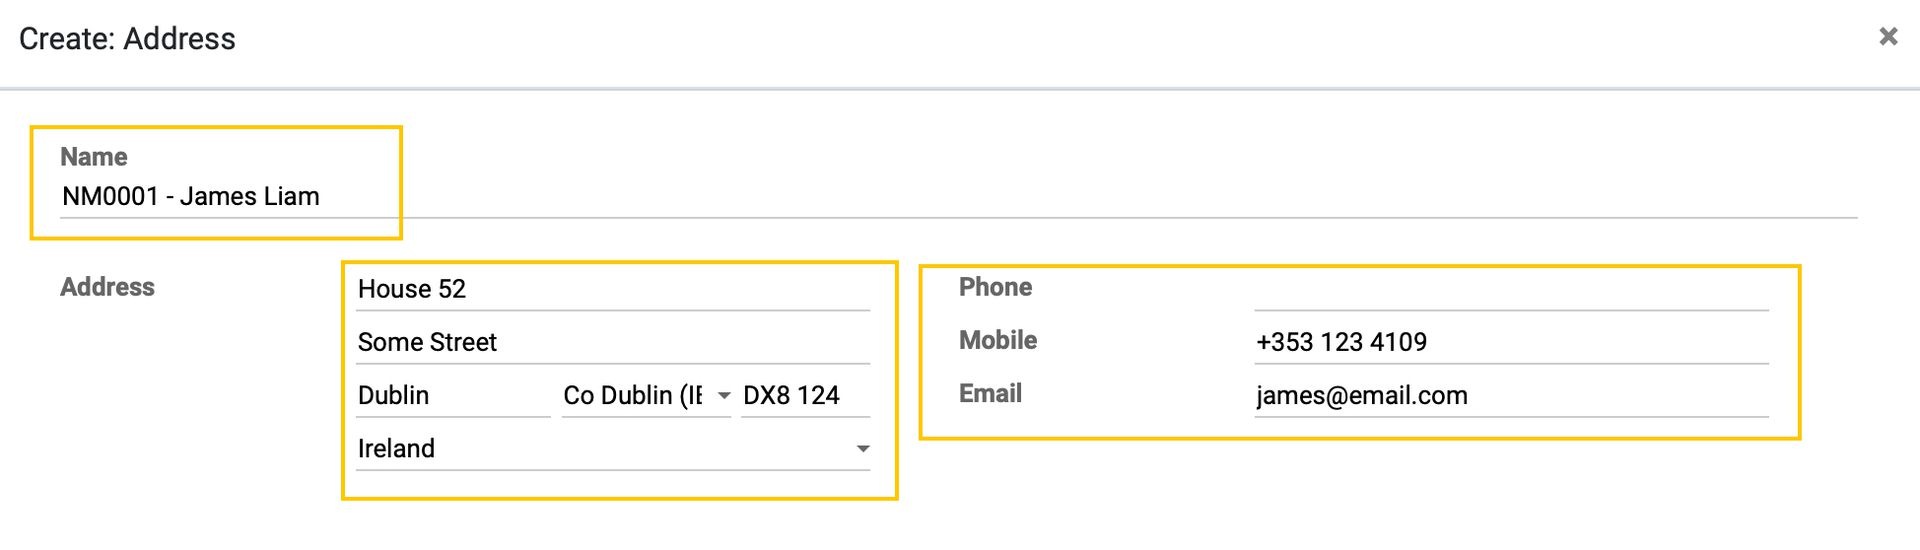
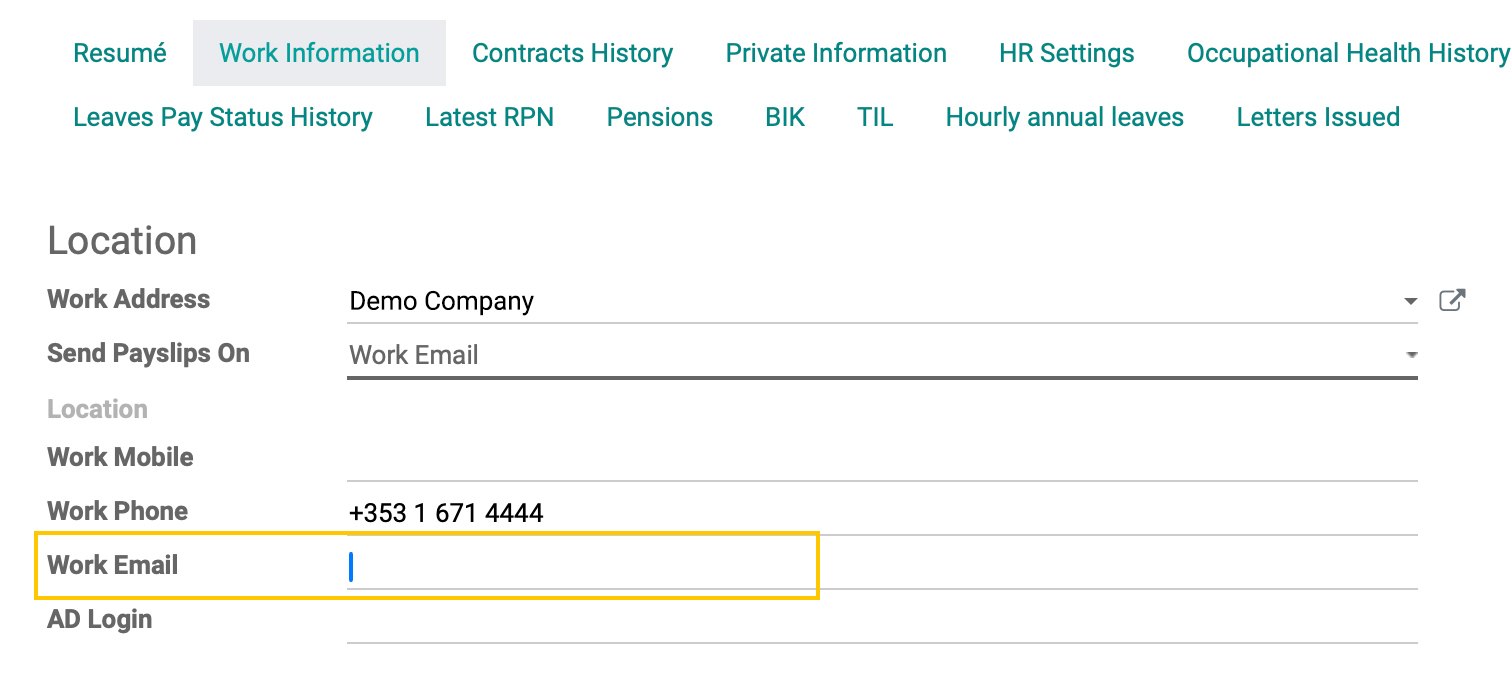
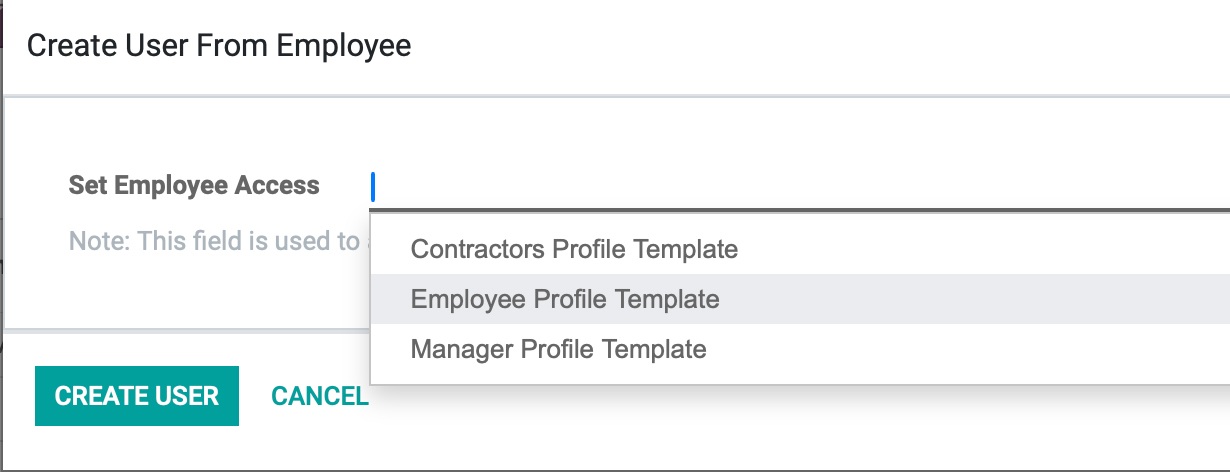
Employee Profile Management Create a new employee. Manage and update employee information.
Full-Time Equivalence and Pay Multiplier Manage full-time equivalence and pay multiplier settings.
Intelligent Data Validations Ensure accuracy and consistency in data entry.
Occupational Health History Maintain records of employee health history.
Organisational Chart Configuration Configure organisational charts and departmental structures.
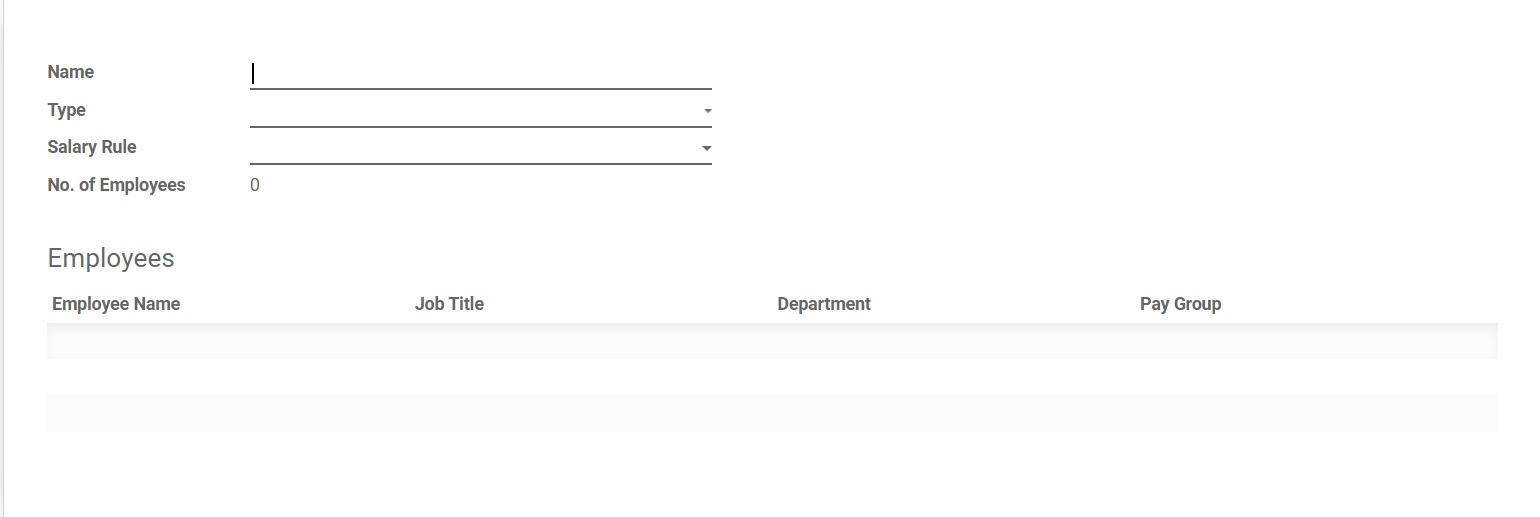
Payroll Information Management Store and manage various information for payroll such as bank account details.
Pay Scales and Multiple Company Support Configure pay scales and manage multiple companies.
Pay Status History Track employee pay status history (e.g., full, half, nil, pension pay).
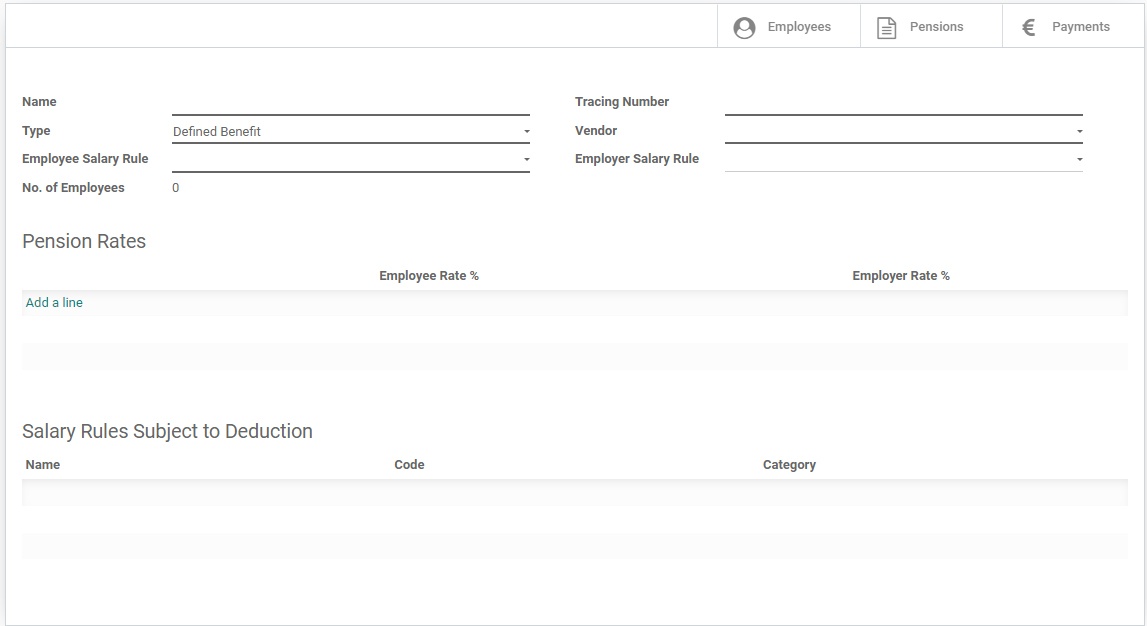
Pension Schemes Set up and administer employee pension schemes.
Probation Period Management Configure and manage employee probation periods.
Quick Access to Payslips Conveniently view and send payslips electronically.
Quick History View of Contracts Easily access a summary of contract history.
Recording External Contractors Maintain records for external contractor engagements.
Relevant Revenue Online (RPN) Integration Display and manage the latest RPN for payroll processing. RPN for Irish payroll and HMRC for UK.
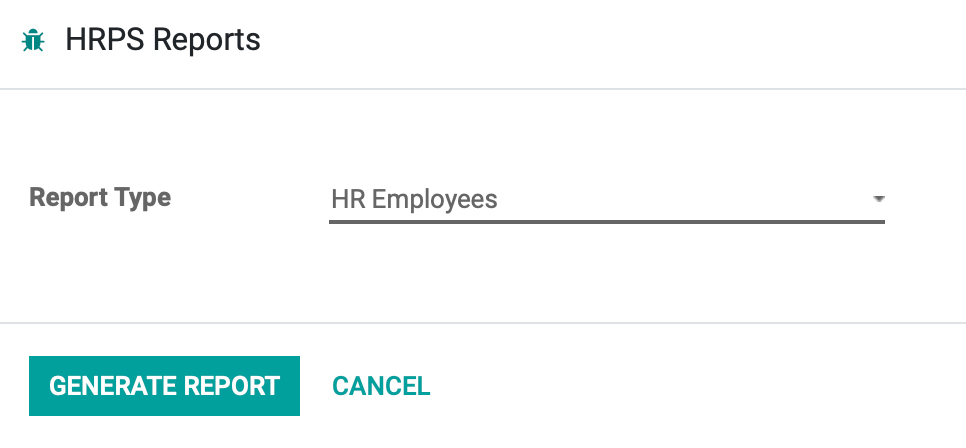
Reports and Analytics Generate reports for insights and decision-making.
Set Up TUPE Company Comprehensive setup for managing TUPE transfers.
Timesheets and Cumulative Tracking Record and monitor timesheets, including year-to-date cumulative hours.
Time in Lieu Manage time-off in lieu accrued for bank holidays and overtime.
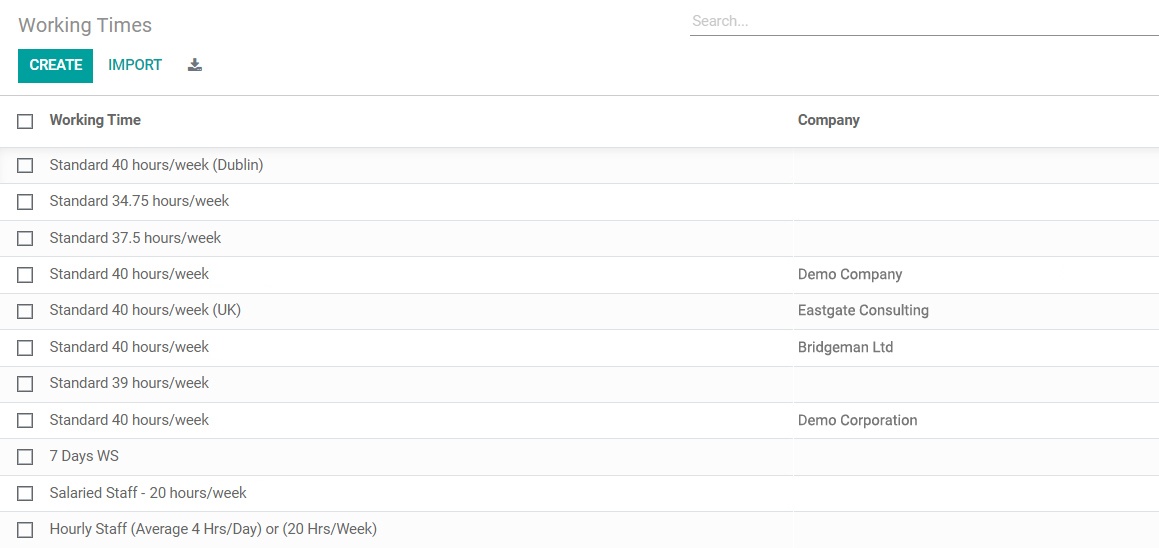
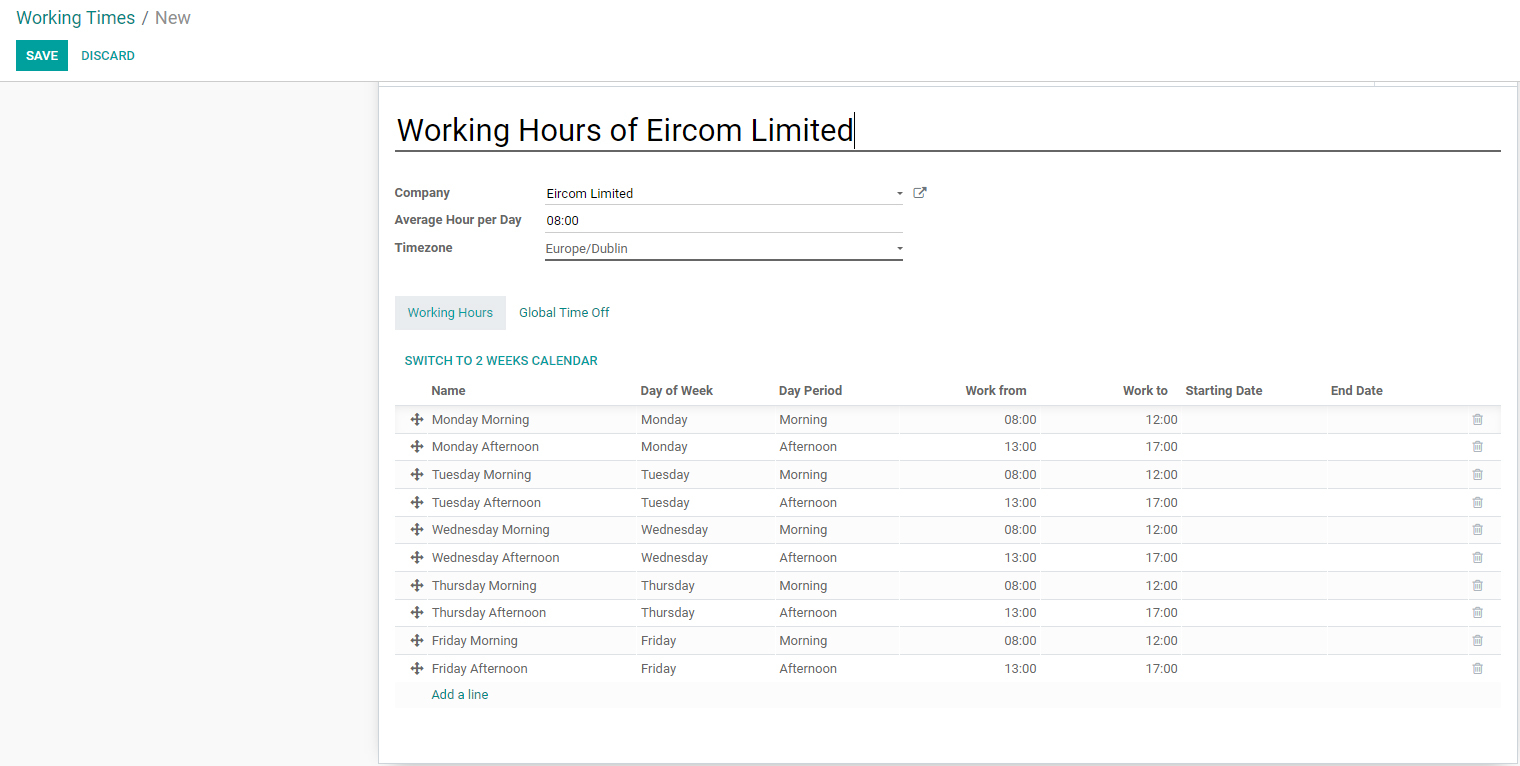
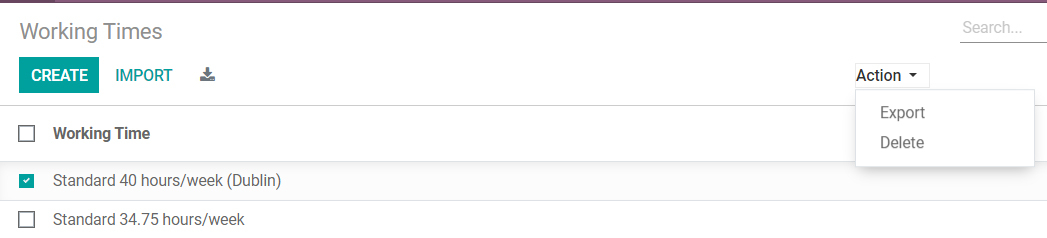
Work Schedules and Timesheet Types Define work schedules and timesheet types.

Accessing the Employee Module


To access the employee module within the NumlaHR solution, begin by logging in with the credentials provided by your organisation. Once logged in, you'll find yourself on the main dashboard, which serves as the central hub for accessing various features and functionalities. To navigate to the employee module look for an app with an icon shown below, or you can just type “Employee” on the screen to find it.


User Roles and Permissions


Role Access Level Details
HR Admin Full Access Can access everything within the employee module.
HR BP Restricted Access Can access all non-HR profiles and contracts.
Employee No Access Cannot see this app.


Setting Up the Employee App

This section is all about the important things you need to set up before using the employee app to its full potential. We will go with each point in detail.

Employee Type


The employee type is used in setting up contracts, this item helps you categorise different types of employees. This list is configurable, you can add or remove them as per your organisation needs.

Employee Type Configuration

  • To access this setting go to Employee > Configuration > Employee Type.
  • To add a new value, click on “Create”, enter the type name and “Save” it.
  • To edit any existing value, just click on it and click “Edit”, make the change and then click on “Save”.

Creating New Employee Type

  • To delete any value, first select it using the available checkbox on the left. Then go to “Actions” and select “Delete”.

Deleting an Employee Type

Departments


Departments form the organisational structure of the company. They help categorise employees based on their roles, responsibilities, and functions within the organisation.

Configuring Departments in the Employee App

  • To access the departments go to Employee > Configuration > Departments.
  • To add a new department, click on “Create”, enter the department name, parent department, business unit, manager, and company then “Save” it.
  • Press on the three dots icon and a list will appear with options for 'To Do', 'To Approve', and 'Reporting'.

Creating Departments Structure

Department Setup Interface

Notice Period


You can set up a notice period to use it on employee contracts.

Configuring Employee Notice Period

  • In the Employee app, navigate to the Configuration section, then select the Notice Period option.
  • Then, click on "Create" to initiate the creation of a new notice period, fill out the required details, and “Save” it.

Creation of Notice Period

  • To delete any value, first select it using the available checkbox on the left. Then go to “Actions” and select “Delete”


Contract Category


It organises employment contracts based on criteria such as type, duration, or role, streamlining management and ensuring compliance.

Contract Category Configuration

  • Navigate to the Employee app, select Configuration, and then Contract Category.
  • To add a new value, click on the "Create" button.
  • Enter the name, then click "Save."

Creating Contract Category

  • To delete a value, select the value on the contract category list using the checkbox on the left.
  • Go to "Actions" and choose "Delete".

Deleting a Contract Category

Work Schedules


This specifies the hours and days employees are expected to work, ensuring clarity and consistency in work arrangements. By outlining start and end times, break periods, and days off, it facilitates efficient resource allocation, and compliance with labor regulations, and promotes productivity while supporting work-life balance and employee satisfaction.

Work Schedule List

  • To access” Work Schedule” go to Employee > Configuration > Work Schedule.
  • To add a new value, click on “Create”, enter the working hours, company, average hour per day time zone, and “Save” it.
  • To edit any existing value, just click on it and click “Edit”, make the change, and then click on “Save”.

Work Schedule Interface

  • To delete any value, first select it using the available checkbox on the left. Then go to “Actions” and select “Delete”.

Deleting Work Schedule

All about an Employee Profile

Let’s dive into the most common use of this app. Creating a new employee profile or modifying an existing one. If you’re an HR personnel, you can navigate to the Employee app and the first screen you see is the list of all employees. Here you manage all the employees' data.

Creating a new Employee Profile


Go into the employee app, and click on “Create”.

Creating a new Employee Profile

Filling out Mandatory fields

These are the minimal set of fields you must know to start creating an employee profile in the system. All mandatory fields are highlighted with a bold underline. Start with completing them first, as you cannot save your record without filling them.

Filling out Mandatory fields

The mandatory fields are as follows:

  • Staff ID
  • Forename
  • Surname
  • PPS No.
  • Joining Date
  • Timesheet Type / Timesheet Period / Timesheet Week / Timesheet Project
  • Gender
  • Nationality
  • Emergency Contact and Phone

If the employee is not an EU resident, then you must also fill out;

  • Visa Type
  • Visa Expiry

After filling up these fields, you can save your record and can come later to add more info.

Adding Contact Information

You can add private address for an employee to their profiles by following these simple steps:

  • Navigate to the employee profile within the Employee app, and open it.
  • Click on “Edit”, then go to the Private Information section.

Adding Contact Information

  • Now click on the area for Address and then select “Create and Edit”.


  • Fill out employee’s address, phone, mobile and email, then click on “Save”.

Adding Bank Account Information

To add bank accounts, you need to make sure that the private contact details are already entered as they are required to link the bank account with the employee profile. Otherwise, we can face potential issues in payroll.

To set up a Payroll or Expense bank account, simply go to the employee profile and click on the related bank account field area, then click “Create and Edit”.

Adding Bank Account Information

  • Open editing mode by clicking on “Edit” on the employee profile.
  • Select the employee’s Bank.
  • Enter IBAN.
  • Keep the Company field empty, this is to make sure there are no issues if there’s any intercompany transfer for them.
  • Select the Account Holder, this field is the Private Contact that you created earlier.
  • Fill up any other info you have and click on “Save”.
  • Now “Save” the changes to the Employee profile.


If you want to use the same account for expense you can pick it from the drop down. If you want to use another bank account for expenses, repeat the above process for Expense: Bank Account.

Adding Work Email and User Account

  • To add a work email go to the employee app and open the employee for whom you want to add/update the work email.
  • Click on “Edit” and navigate to the Work Information section.

Adding Work Emai

  • Add the work email, then click on “Save” to save your changes to the employee profile.

Now, if you want to create a user account for a new employee or want to update role of an existing employee to manager, follow these steps:

  • Go to the list view of the employee app, and select the employee.
  • Click on “Actions” and then “Create User From Employee” if you are creating a user account for them, or “Update Employee Access” to update their role of the existing account.

Create User From Employee

  • Now on the new window, select the appropriate access from the drop-down options, then click “Create User” or “Update Access” according to your case, and you’re all set.

Create User

Important Fields for Payroll

The following fields are important to ensure a smooth processing of a payroll.

  • PPS no.
  • PRSI Class
  • Revenue Employee ID

Archiving an Employee Profile


An employee is automatically archived when he leaves the company and payroll pays their last pay. In some cases, you may need to unarchive or re-archive an employee profile, and to do so follow these steps:

  • Go to the employee app, and select the employee you want to archive or unarchive.
  • Click on “Action” and then “Archive” or “Unarchive” (depending on your case).

Archiving an Employee Profile 

  • Read the confirmation dialog and then click “OK” if you agree.
  • If a register departure window appears “Cancel” it.

Register departure

Reporting

Reports are very important to look through your data in a meaningful way and derive value from it. Here are the reports that are available in our system.

HRPS Report


The HRPS (Human Resources Personnel System) report provides comprehensive data for all employees, combining information from their profiles and contracts into a single sheet. This report includes details such as salary information, department, business area, organisational hierarchy, probation details, cost center, annual leave entitlement and remaining balances, pay scale, contract category, joining date, leaving date, continuous service date, personal contact details, bonus, hourly rate, and much more.

All data is automatically refined based on the user's role. For example, an HR Business Partner (HRBP) will only see their relevant data and won't have access to other HR personnel's information. However, an HR Admin can view all employee data.

To access this report, navigate to Employees > Reporting > HRPS Report.


Anomalies Report


The contract anomalies report in the employee app helps identify, analyse, and rectify irregularities or discrepancies within employee profiles and contracts, ensuring compliance with payroll regulations.

The report includes intelligent validations that verify various crucial details, including:

  • Employees with active contracts but a pay multiplier set to zero.
  • Employees with missing or invalid bank account details.
  • Employees with expiring contracts.
  • Pay-group and company mismatches.
  • Absence of Revenue ID.
  • PPSN validation.
  • Leavers with active profiles.
  • Active employees with no running contracts.
  • Undefined PRSI/NIC class.

To access the report, navigate to Employee > Reporting > Anomalies Report.


Search and Save as Favourites


Our system allows you to apply filters and grouping to your data, enabling you to gain valuable insights. You can save these filters as favorites for quick future access or to share them with others.

  • To create filters, navigate to any screen and locate the search bar. Enable the filters by clicking on the magnifying glass icon.


  • Next, open the filter and click on "Add Custom Filter". Select the field you wish to filter, choose the appropriate operator, enter the desired value, and click "Apply". You can add multiple filters by clicking on "Add a Condition" and repeating the process.

Applying custom filters

  • Similarly, you can group the data by specific fields by selecting "Group By" and choosing the desired field(s) to group by. You can select multiple fields for grouping.

Group By

  • Once you have created a useful filter, you can save it to avoid repeating the same work. When saving, you can also choose whether to make the filter available to others or to use it as your default setting.

Saving filters as favorites

Configuration

In this section, we can show them how the configurations can be updated to meet the changing needs of an organisation.

Timesheet Type/Timesheet Period/Timesheet Week


  • Navigate to the Employee section within the employee app.
  • Select the employee whose timesheet you want to edit by clicking on their name or profile.
  • Once you've selected the employee, locate and click on the "Edit" button.
  • Click on the relevant option (e.g., Timesheet Type) to make changes.
  • “Save” your changes once you've made the necessary adjustments.

Showing timesheets field on employee profile

Job Position


  • First, navigate to the “Employee App” and go under “Configuration”. 
  • From there, select Job Positions to create a new job position. 
  • Here, you can input details such as the “Job position”, title, company name, description, website, and other relevant information.
  • Once entered, “Save” the changes to update the job position configuration.

Showing details related to job position 

Notice Period


  • First, go to the Employee app, navigate to Configuration followed by Notice Period.
  • To add a new notice period, click on “Create” and enter the notice period.
  • “Save” your changes once you've made the necessary adjustments.


Cost Centre


  • In the Employee app. First, navigate to “Configuration”, followed by the Cost Centre
  • There, you will create a “Cost Centre” by entering details such as“ code” and “name”. 
  • “Save” the changes, once entered.

Showing cost center 

BIKs Configuration


  • First, navigate to the “Configuration, in the “Employee App”.
  • Then, we'll go to the BIKs Configuration
  • There, we'll press the create option, enter details such as “name, type, salary rule”, etc., and then “Save” the changes.


Teams


  • Begin by accessing the “Employee App”, then move to the “Configurations” tab.
  • From there, navigate to the Teams section.
  • Then click on the “Create” option, where you'll be prompted to fill in details such as the “team's name”, “code”, and “select a team lead”.
  • After providing the necessary information, remember to “Save” the changes."

Showing Teams 

Visa Type


  • Start by accessing the “Employee App”, then proceed to “Configurations”.
  • Within “Configurations”, locate and select Visa Type.
  • Next, click on the “Create” option. Here, you'll fill in the necessary details about the visa type.
  • “Save” the changes to ensure they're properly recorded.


HRBP Department


  • By accessing the “Employee App”, First.
  • Navigate to the “Configurations” section, and then proceed to the HRBP Department.
  • Within this section, select the 'Create' option. Here, input the required details, such as “department name” and “code”.
  • Additionally, designate a team lead if necessary. Once all details are filled, remember to “Save” the changes to ensure they are applied effectively.

Shows HRBP departments 

Pension Scheme Configuration


  • To configure the Pension Scheme, start by accessing the "Employee App" and navigating to the "Configurations" section.
  • From there, select "Pension Scheme Configuration". Within this menu, opt for the "Create" option to initiate the setup process. Here, input all relevant details such as “scheme specifics” and other necessary information.
  • Once all required information is entered, remember to “Save” the changes to finalise the configuration.


Employee Type


  • Start by accessing the "Employee App" and navigating to the "Configurations" section.
  • From there, select Employee Type Configuration.
  • Within this menu, opt for the "Create" option to initiate the editing process. Here, input all necessary details as required, ensuring accuracy and completeness.
  • Once all details have been entered. Remember to “Save” it.


Contract Category


  • To Navigate to the Contract Category.
  • Begin by accessing the "Employee App" and proceeding to the "Configurations" section. Within Configurations, select "Contract Category".
  • In the “Contract Category” menu, choose the "Create" option to initiate the creation process.
  • Here, input all required details as prompted, ensuring accuracy and completeness. After entering the necessary information, “Save” it.

Showing contract category 

HR Director


  • Commence by accessing the “Employee App”, followed by navigating to the “Configurations” section.
  • From there, proceed to the HR director configuration.
  • Next, select the “Create” option, where you'll be prompted to input the necessary details.
  • Once the details are filled in, remember to “Save” it.

Shows HR directory 

Work Schedules


  • Initiate by navigating to the “Employee App”. From there, proceed to the “Configuration” section and select Work Schedule.
  • Next, choose the”'Create” option to initiate the editing process.
  • Fill in the required details, such as “schedule name”,” working hours”, and any additional specifications.
  • Once all details are entered, click “Save” to confirm.


FAQs

On the employee profile under the Work Information section, there’s a field named Send Payslips On, you can set the email preference using that.


Which element on the employee profile determines the position of an employee in the organisational chart and other reports?

The department field on the employee profile is used across all the reports and the manager assigned to that department is used to determine the position in an organisational chart.

Glossary

Term Description
HRBP Human Resource Business Partner
RPN Revenue Payroll Notification
TIL Time in Lieu
BIKs Benefit in Kind

Version History

1.0

Prepared By

Palwasha Azher

Date Updated

31/04/2024