by Dharmesh Patel
In Odoo, adding a confirmation dialog for button actions in forms (views) is a common requirement to prevent users from accidentally performing significant actions, such as confirming transactions. Odoo provides a standard way to achieve this by using the confirm attribute in the XML view definition of your button. This attribute allows you to specify a message that will be displayed to the user in a confirmation dialog when the button is clicked. The action will only be executed if the user confirms the dialog.
How to Add Confirmation Dialog to a Button in Odoo
Here's a step-by-step guide on how to add a confirmation dialog to a button in Odoo using its standard functionality:
1. Identify or Create the Button
First, you need to identify the button to which you want to add the confirmation dialog. This could be a button you've already defined or a new button you're adding to an existing view. If you're creating a new button, make sure you properly define it in the XML view for your model.
2. Add the "Confirm" Attribute
To add the confirmation dialog, you simply need to add the confirm attribute to the button definition in the XML view. The value of this attribute should be the message you want to display to the user when they click the button.
Example:
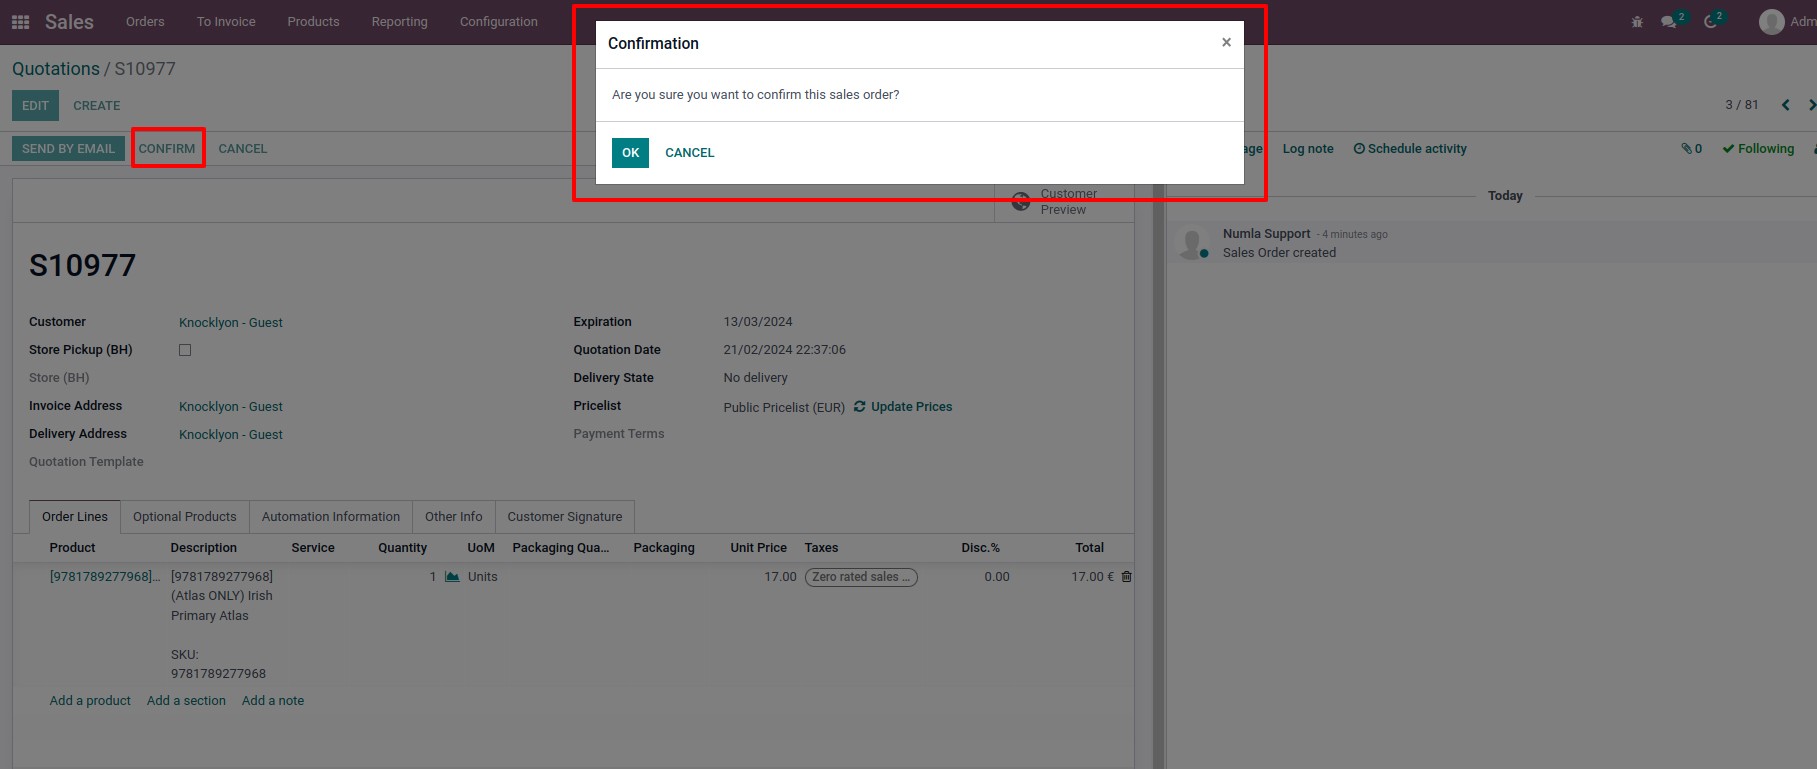
Here's an example of how to add a confirmation dialog to a sale order “CONFIRM” button.
<record model="ir.ui.view" id="view_order_form_mods" >
<field name="name">Add Confirm dialog on sales order Confirm</field>
<field name="model">sale.order</field>
<field name="priority">100</field>
<field name="inherit_id" ref="sale.view_order_form"/>
<field name="arch" type="xml">
<xpath expr="//button[@id='action_confirm']" position="attributes">
<attribute name="confirm">Are you sure you want to confirm this sales order? </attribute>
</xpath>
</field>
</record>
In this example:
- action_confirm is the name of the method of sales order “CONFIRM” button and it gets called when the button is clicked.
- The confirm attribute contains the message shown in the confirmation dialog.
3. Update the Module
After adding or updating the button in your XML view, make sure to update the module where this change was made. This can be done from the Odoo Apps interface or by using the command line, depending on how you manage your Odoo installation.
4. Test the Button
Finally, navigate to the form view where your button is located and test it by clicking the button. You should see a confirmation dialog with the message you specified. The action will only be executed if you confirm the dialog.
By following these steps, you can add confirmation dialogs to buttons in Odoo forms using standard functionality, enhancing the user experience by preventing unintended actions.