by Ans Ali Zaidi
In today's digital era, mobile applications have become an integral part of our lives. Whether it's ordering food, booking a cab, or purchasing goods online, the convenience of mobile apps has revolutionised the way we interact with businesses. For developers, integrating payment systems into these applications is a crucial step toward providing seamless user experiences. One popular solution for handling payments is Stripe, renowned for its simplicity and robustness.
In this article, we'll explore how to integrate Stripe into Flutter applications, making the payment process smoother for both developers and users.
Why Stripe?

Stripe has gained immense popularity among developers and businesses for several reasons:
1. Developer-Friendly
Stripe offers comprehensive documentation, SDKs, and APIs that simplify the integration process.
2. Security
Security is paramount when dealing with payment information. Stripe handles PCI compliance, reducing the burden on developers.
3. Flexibility
Stripe supports various payment methods, including credit cards, digital wallets (Apple Pay, Google Pay), and more, catering to a wide range of users.
4. Scalability
Whether you're a small startup or a large enterprise, Stripe scales with your business, providing features and support to accommodate growth.
Integrating Stripe with Flutter
Flutter, Google's UI toolkit for building natively compiled applications for mobile, web, and desktop from a single codebase, provides a robust framework for creating cross-platform apps. Integrating Stripe into Flutter apps involves a few straightforward steps:
1. Set Up a Stripe Account
Before integrating Stripe into your Flutter app, you'll need to sign up for a Stripe account on their website. Once registered, you'll gain access to the Dashboard, where you can obtain API keys and configure settings according to your business requirements.
2. Add Dependencies
In your Flutter project, add the “stripe_payment” package to your “pubspec.yaml” file:
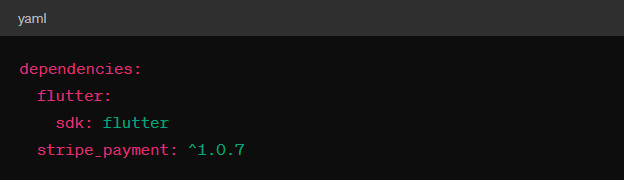
Then, run `flutter pub get` to install the package.
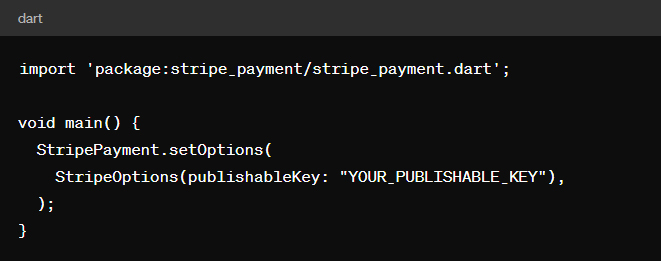
3. Configure Stripe
Initialise Stripe in your Flutter app by setting your publishable key. This key is obtained from the Stripe Dashboard.
4. Collect Payment Information
Create a payment form where users can enter their payment details. You can use Flutter widgets to design a custom UI for this purpose.
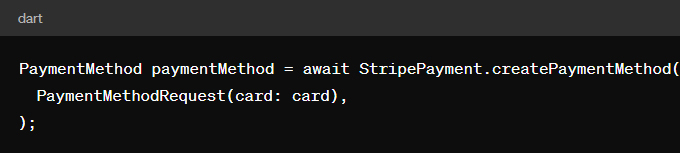
5. Process Payment
Once the user submits the payment form, use the Stripe SDK to tokenize the payment information and send it to your server for processing.
6. Handle Responses
Handle success and error responses returned by Stripe, accordingly, updating the UI to reflect the payment status.
Final Thoughts
Integrating Stripe into Flutter applications empowers developers to create secure and streamlined payment experiences for their users. By following the steps outlined above, you can seamlessly incorporate Stripe's powerful payment processing capabilities into your Flutter projects, opening new opportunities for monetisation and enhancing user satisfaction. With Stripe handling the complexities of payment processing, developers can focus on building innovative features and delivering exceptional user experiences.
Stripe integration in Flutter paves the way for efficient, secure, and scalable payment solutions, making it a preferred choice for businesses and developers alike.