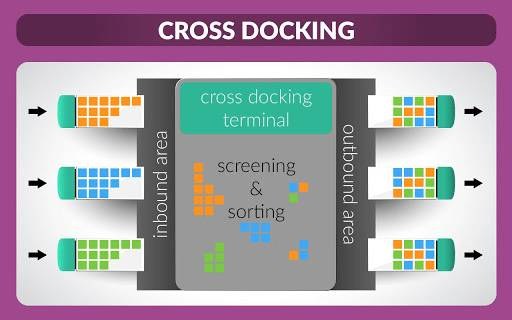
What is cross-docking?
Cross-docking
refers to the practice of directly sending received products to customers
without routing them through the stock. Instead, trucks are unloaded in a
designated Cross-Dock area where products are reorganised before being loaded
onto another truck. This streamlined process eliminates the need for products
to enter the stock before reaching their final destination.
Configuration
To activate the
Multi-Step Routes feature in the Inventory app, access the Configuration
settings and open the Inventory app.
From there, navigate to Configuration
-> Settings and enable the Multi-Step Routes functionality.
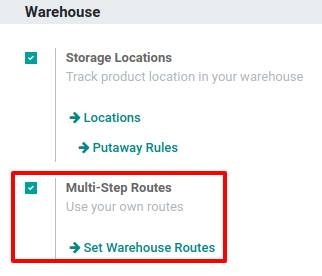
Note: Enabling the Multi-Step Routes feature in the Inventory app will automatically activate the Storage Locations functionality as well.
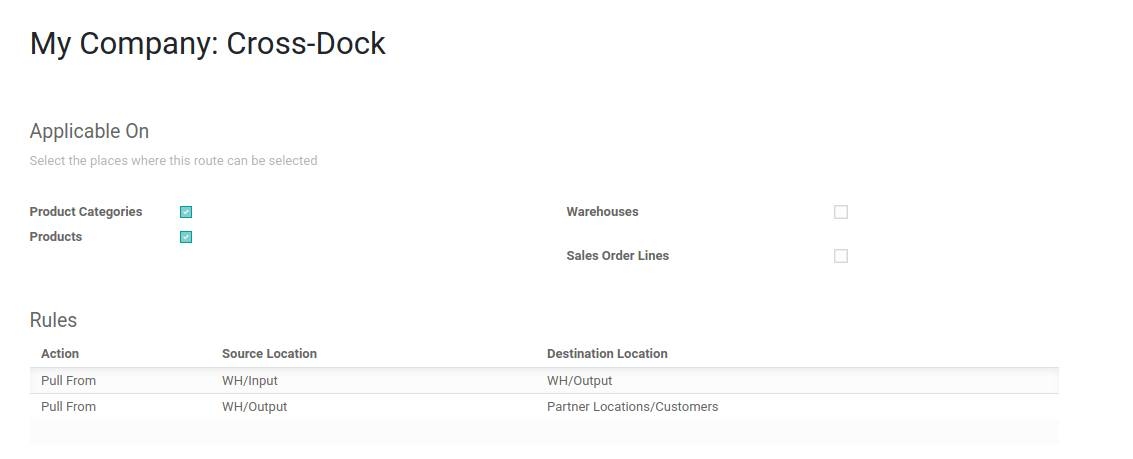
By making this modification, a Cross-Docking
route will be created, which can be accessed in the Inventory app under
Configuration -> Routes.
Configure products with Cross-Dock Route
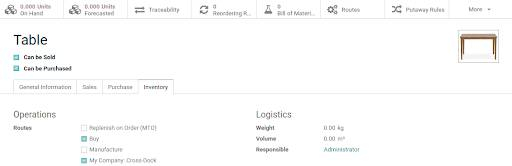
To utilise the Cross-Dock Route, begin by
creating the product associated with it. Then, navigate to the inventory tab
and select both the Buy and Cross-Dock routes for the product. Moving to the
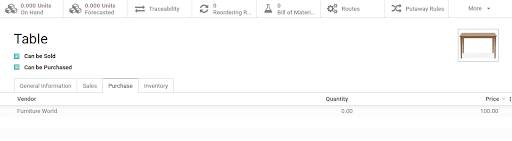
purchase tab, specify the vendor from whom you are purchasing the product and
set the corresponding price.
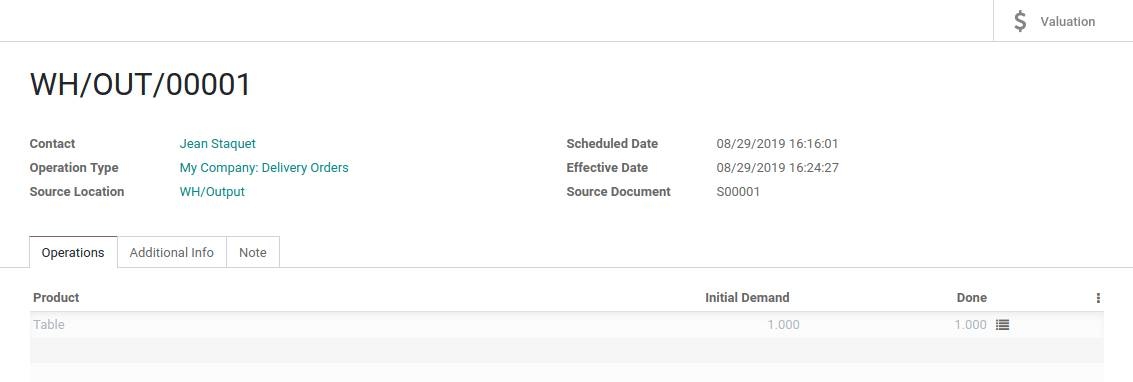
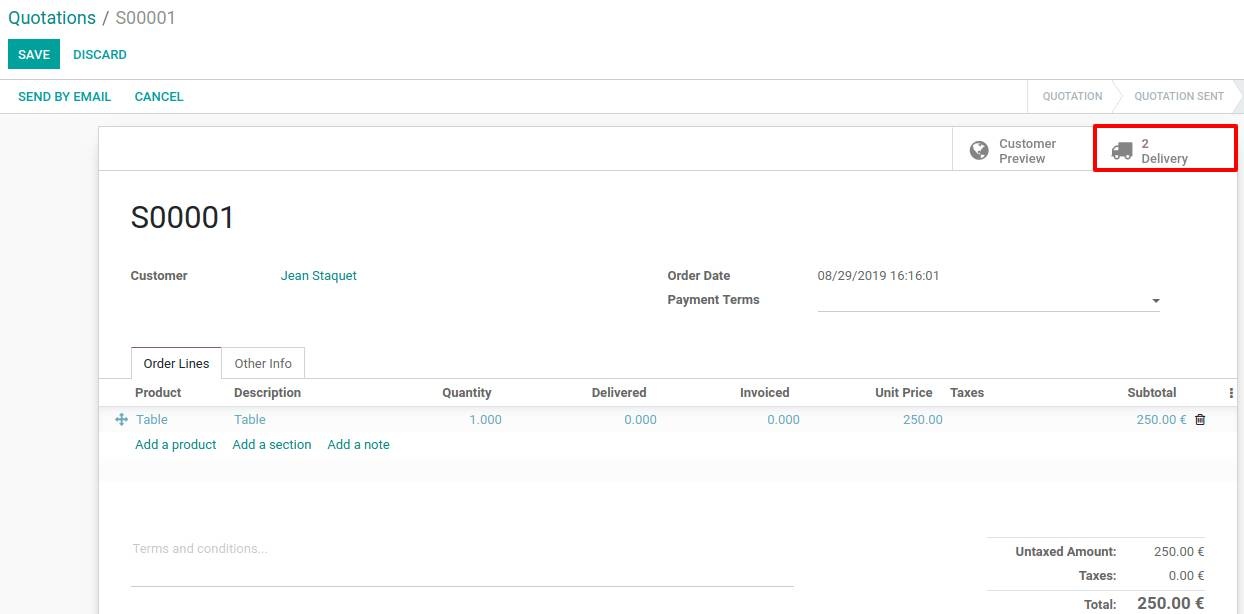
After completing the previous steps, proceed to
create a sale order for the product and confirm it. Odoo will generate two
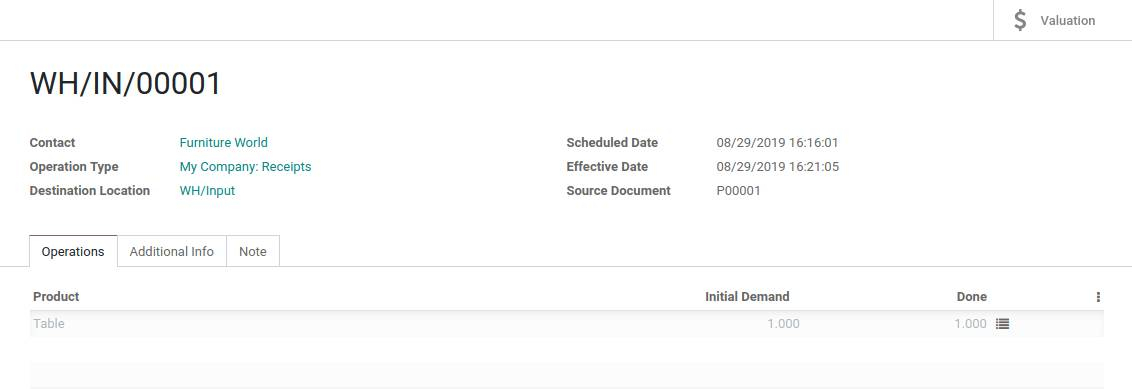
transfers that are associated with the sale order automatically. The first
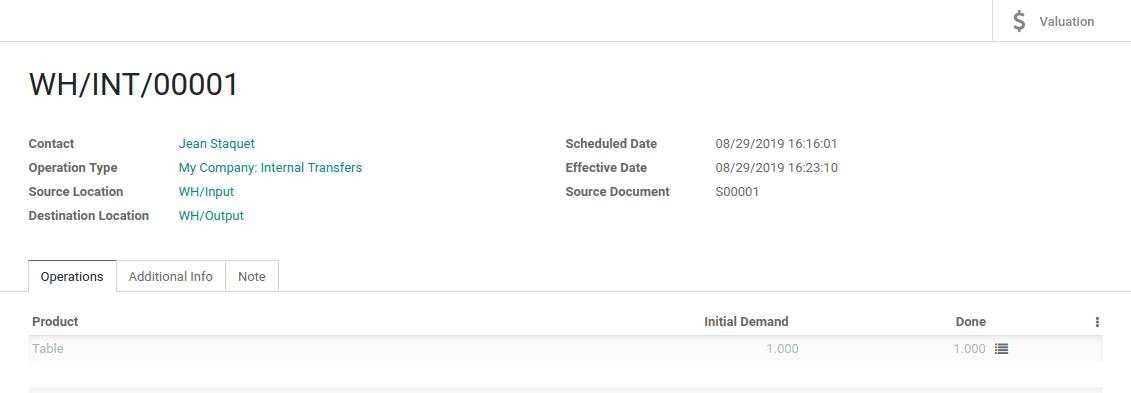
transfer corresponds to the movement of the product from the Input Location to
the Output Location within the Cross-Dock area. The second transfer represents
the delivery order from the Output Location to the designated Customer
Location. Both transfers will be in the state "Waiting Another
Operation" since the product still needs to be ordered from the supplier.

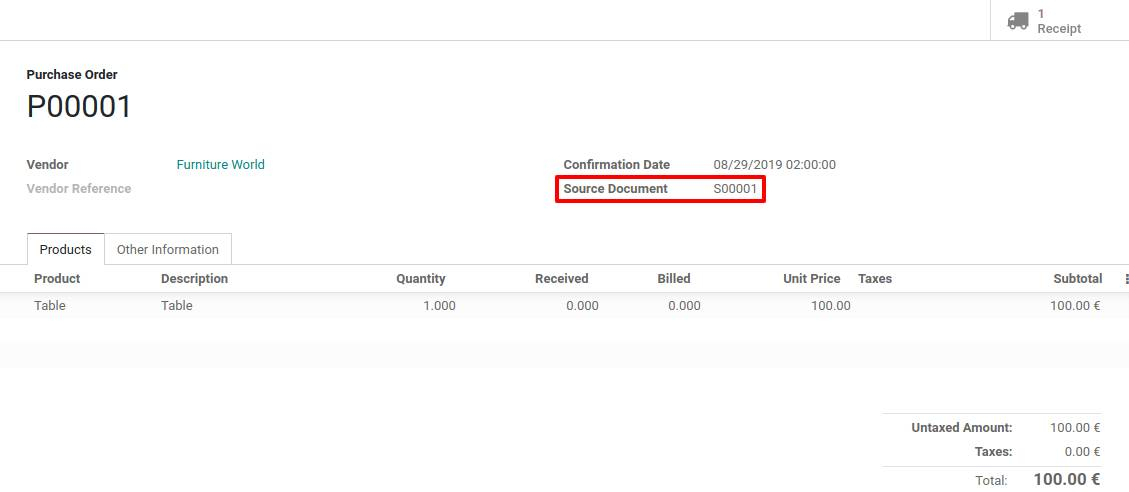
Next, navigate to the Purchase app. You will
locate the purchase order that has been automatically generated by the system.
Proceed to validate the purchase order and receive the products in the designated
Input Location.
Once the products have been received from the
supplier, you can return to the original sale order and validate the internal
transfer from the Input Location to the Output Location.

The delivery order is now prepared for processing
and can also be validated.